Dedicated Micros CCTV Camera Setup
Prerequisites
DM Camera module registered
Public static IP address, port forwarded to Patriot server (only if receiving events)
Run the install program AD Holdings, Native windows SDK..exe on each workstation. If you have not received this file, please contact your software supplier. The installer can be run silently using this commandline,
AD Holdings, Native windows SDK.exe /NOICONS /VERYSILENT /SUPPRESSMSGBOXES
This SDK was updated in version 6.2 patch 090513. Contact Patriot for a copy of the updated SDK if upgrading Patriot from an older version or patch.
See also
Task Setup
Open the Task Settings screen, from System > Tasks > Task Settings
Select the + icon to insert a new task, and select Dedicated Micros from the drop-down.
Click next, and confirm the listening port is correct. This port will need to be forwarded from the external IP to the Patriot machine.
Save the task to begin listening for DM messages.
Client setup (DVR)
The following settings must be enabled in the DVR to allow alarm reporting to be sent to Patriot.
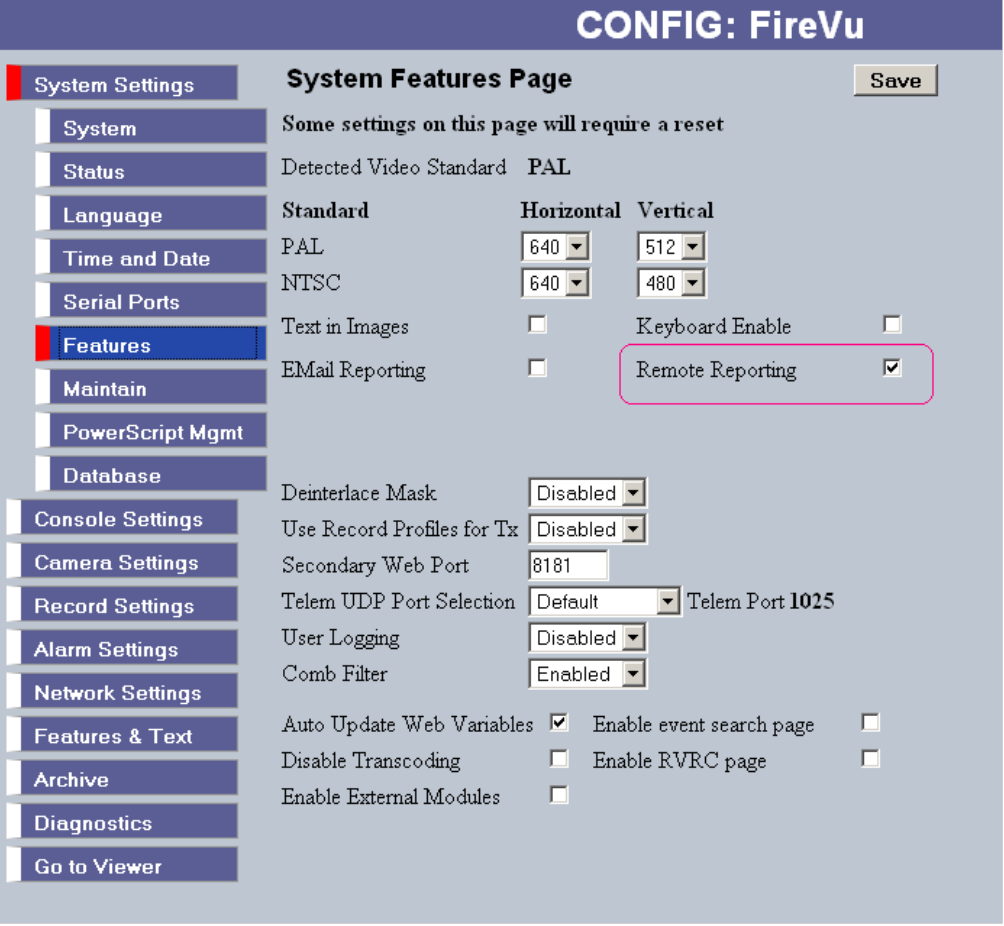
First enable remote reporting on the System | Features page.
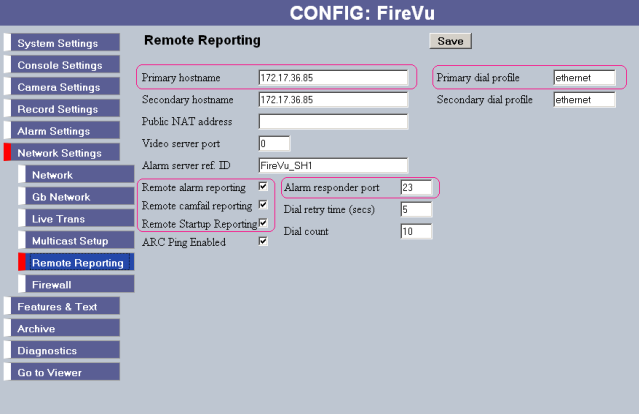
Next configure where the alarm message will be sent to. Set an Ethernet profile and configure the destination address and port. This port must match the port in the Patriot DM task settings. Ensure the tick boxes are set to allow notification of Alarms, Camera fails and DVR start up. The Alarm server ref ID will be used as the Client ID in Patriot, so this should be set appropriately.
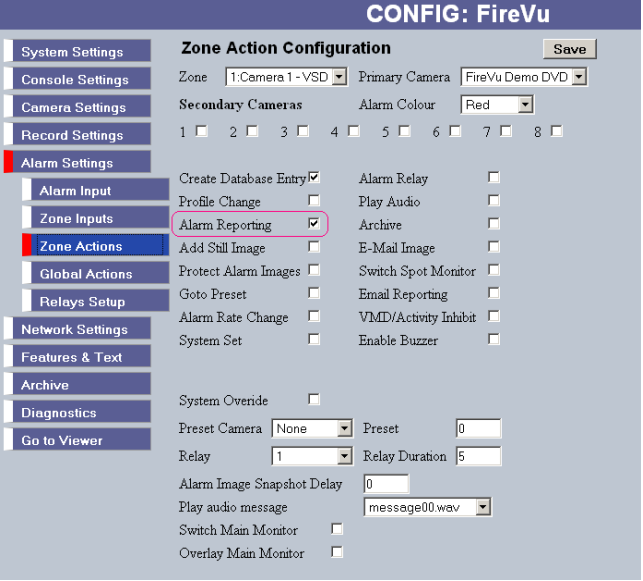
To receive alarm messages (ie: from an input contact) Set an alarm input to trigger an alarm zone. Then on the screen below select the zone and enable alarm reporting.
Patriot Client Setup
First, the Dedicated Micros Template (DM000101) will need to be imported if it does not exist. Contact your software supplier for a copy of the template.
Create a new client, using the DVR alarm server ref id setting as the client id. The area should be left as 0001, and the port id should match the setting in the Patriot DM task. Use the Alt-lookup on the Event Types tab to select the Dedicated Micros template.
Next setup the cameras.
In the Maintain Client Window, go to the Zones Tab. Set the Camera Type option to 'DM Camera.' Enter the IP address of the DVR and the login and password (if required).
Select a Zone which will have a camera associated with it and tick enable video. The zone number should match the camera number on the DVR.
The camera can be viewed directly by clicking on the camera icon next to the zone, in the zone list. The list of installed camera numbers can be requested from the site by clicking on the info button, from the camera tab.
Dual Monitoring with an Alarm Panel
If you are monitoring the site in combination with a standard alarm panel, you will need to setup dual monitoring. In a dual monitoring scenario it is likely that you will get zone conflicts between the alarm panel zone list and the Dedicated Micros camera listing. For this reason recommended practice is to setup a separate area account for the camera system. See the Dual Monitoring section of DVR monitoring for more details.
Operation: Using the Cameras
When an alarm is received for a site equipped with cameras, and a zone with camera coverage has activated, a Camera Button will appear on the Activation tab (if multi screen support is enabled, the camera controls will be displayed immediately), clicking on the Camera button will take the operator directly to the camera associated with the Zone which has originated the activation. When responding to an activation, the camera display will be automatically put into event view. The first connection shows the alarm event (beginning 10 seconds before the alarm) for the activated zone. The alarm event footage can be replayed easily by clicking on the play from time button. The second connection shows the live feed from the activated zone.
When using the camera controls in anything other than single view (i.e. quad, nine etc), the camera controls on the left hand tool bar apply to the selected connection. The selected connection has a green border around it. You can change the selected connection by clicking on another connection. The camera control buttons will only be enabled if a camera (from the camera list) has been selected.
You may also view the camera on demand by opening up the zone record for the camera and clicking on the View Camera button.