ICA Overview
Some of the features detailed in the tutorial below may not be available on the version of ICA that you are using. This is a comprehensive guide that covers all versions of the Internet Client Access and therefore some windows and features may not be available through your monitoring station.
Logging in to Internet Client Access
ICA Users can sign into your client portal from any web capable device including desktop PCs, tablets and smart phones.

The internet link and passwords will be supplied by your monitoring station. Passwords can be resset via the Forgot Password link below login.
Dashboard
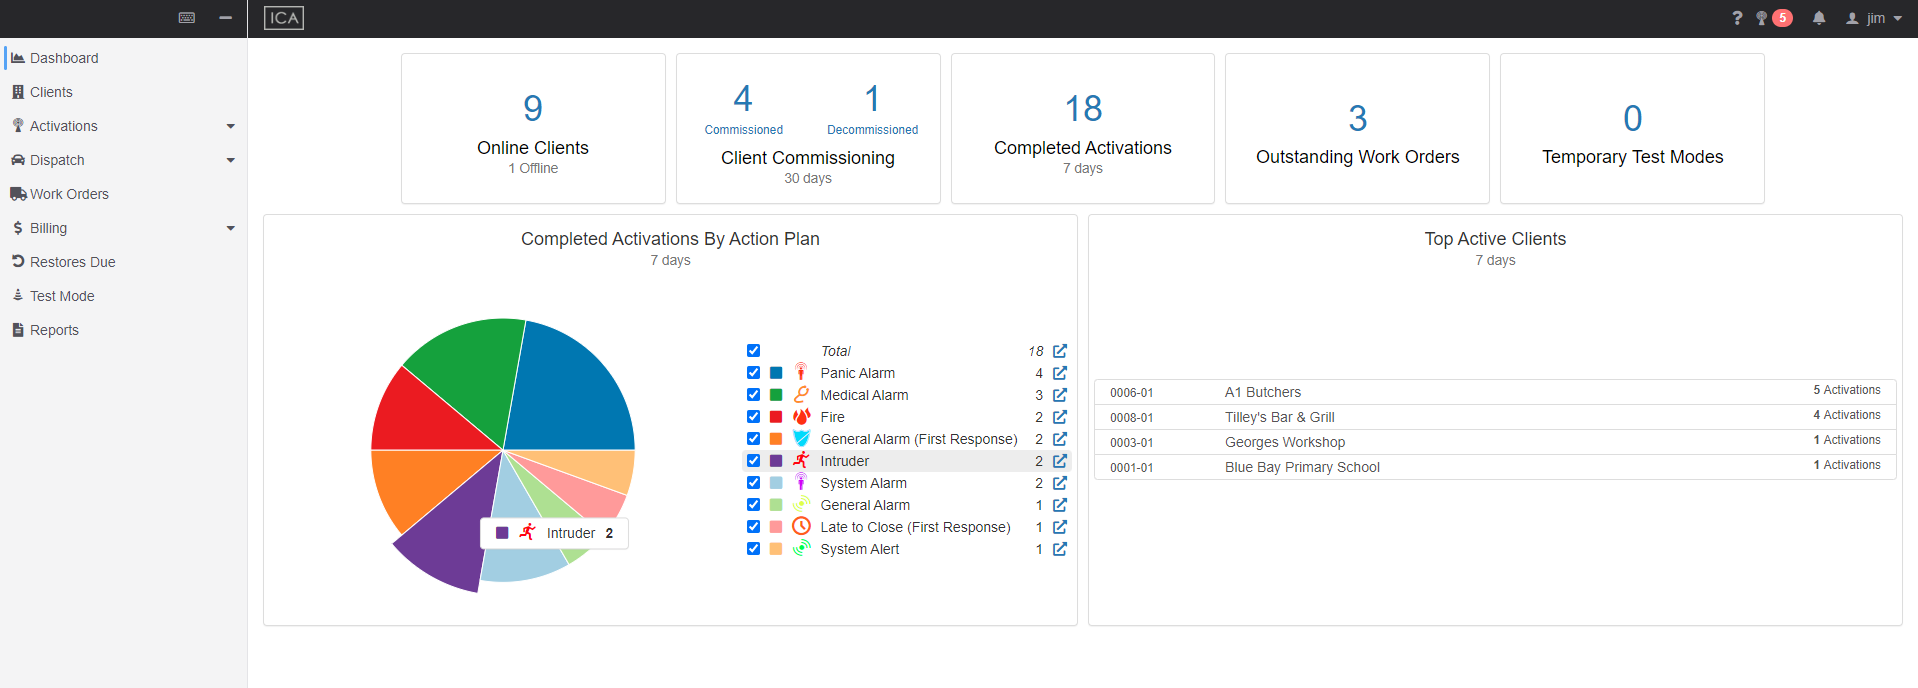
When you first log into ICA you will be presented with the dashboard. This will display a quick overview of what is happening.
Top Menu
ICA Home Button
The ICA button in the top left of the Top menu will return you to the ICA Dashboard.
![]()
Help Button
This button will link you to this document.
![]()
Current Activations
This will display how many current activations are new and not assigned to an operator. Clicking this will navigate to the current activations window.
![]()
Notifications
This will display how many notifications you have unread. Clicking this will navigate to the notifications window.
![]()
Account Menu
Clicking your name in the top right of ICA will present a list of options relating to account management.

Alarm Sounds
This will toggle the alarm sounds being played.
see alarm sounds for more information.
Change Password
This will present a form for changing your password. You will have to enter your current password and your new password twice to confirm it is correct.
Set Account Recovery Email
This will present a form for setting your recovery email address, should you forget your password.
Enable / Disable MFA
This will present a form for enabling or disabling Multi Factor Authentication on your account.
Sign Out
This will sign you out of ICA.
Sidebar Menu
On the left side of ICA is the Sidebar, allowing quick access to the various areas and features. This can be expanded or collapsed with the buttons at the top of the side bar.
When the sidebar is collapsed, hovering the mouse on the edge of the window for a moment will expand the sidebar without pinning it in place.
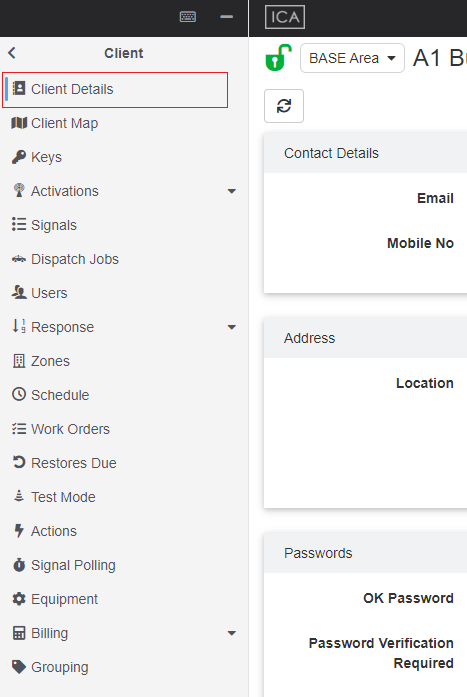
The sidebar will display navigation options depending on where you currently are in ICA. Example: if you are in a client, the sidebar will display the client tabs.
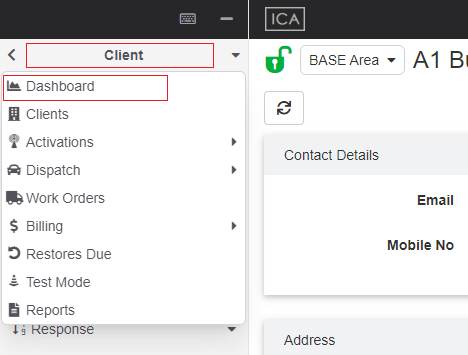
To access the dashboard navigation menu, select the header at the top of the sidebar and a popup menu will appear with the dashboard navigation options.
The sidebar is contextual and will show menus relevant to where you are in ICA.
Keyboard Shortcuts
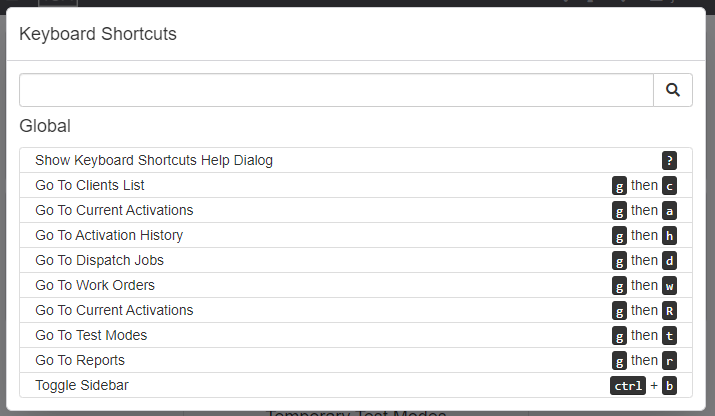
ICA has many keyboard shortcuts to quickly jump to specific pages or perform actions.

Use the Keyboard Shortcuts button in the sidebar menu to see an overview of available shortcuts. Some shortcuts are contextual and only work on specific pages.
You can also hover your mouse over ICA items to view their keyboard shortcut directly.

The Client List
The clients window will show you a list of all your client accounts and their armed / disarmed status. You can select any of these clients by clicking on their name.
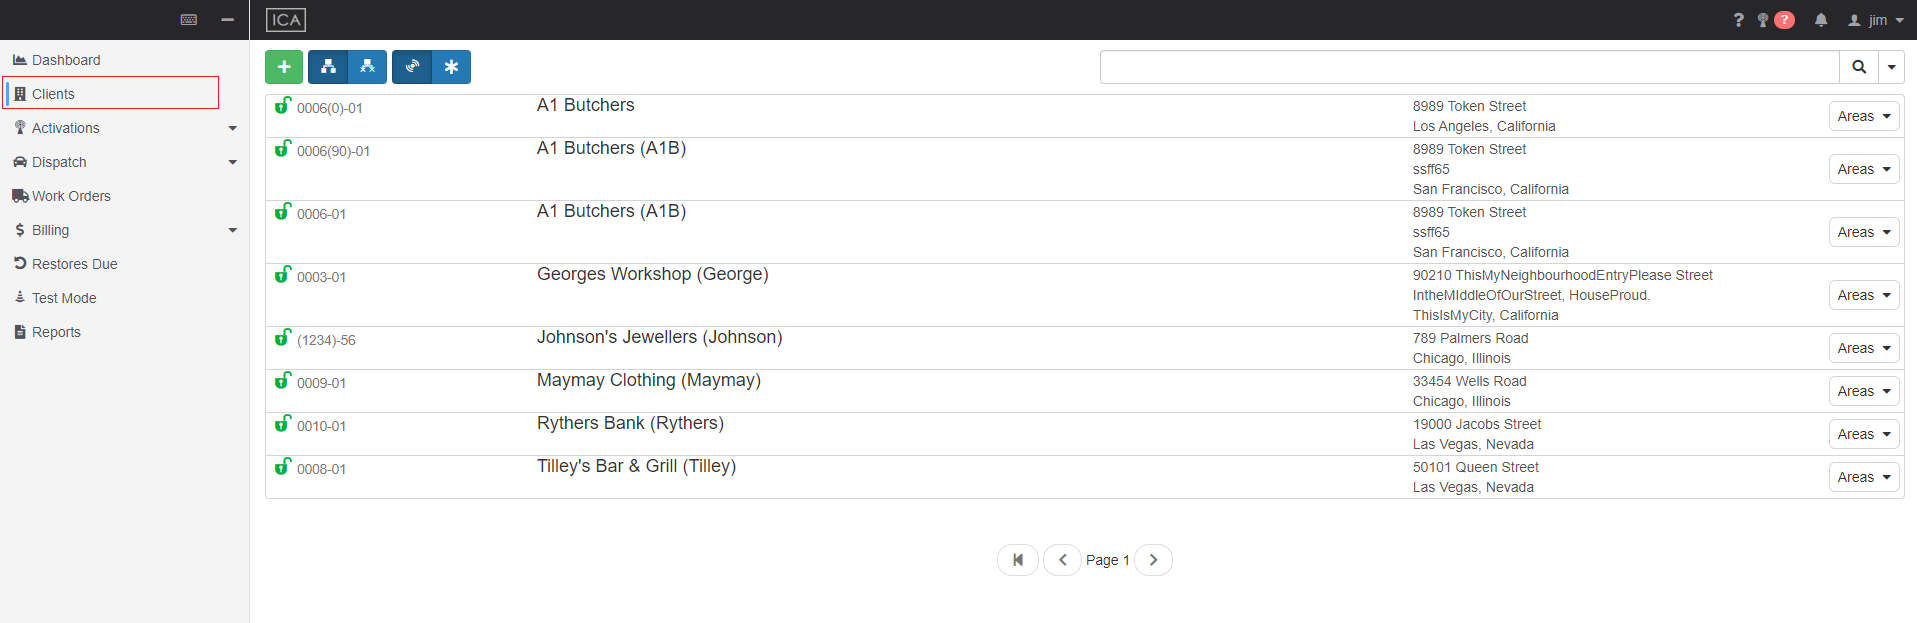
You can filter the client list to show only the base areas or filter out any 'offline' customers from the results.

Enter in search terms of phrases and click the search button to show the results.

As well as using the filter buttons and search terms to narrow down the results you can also choose which fields Patriot is searching in. These search fields can be for either the client details or the users assigned to the account and each field can be selected or deselected by clicking the arrow button beside the search button.
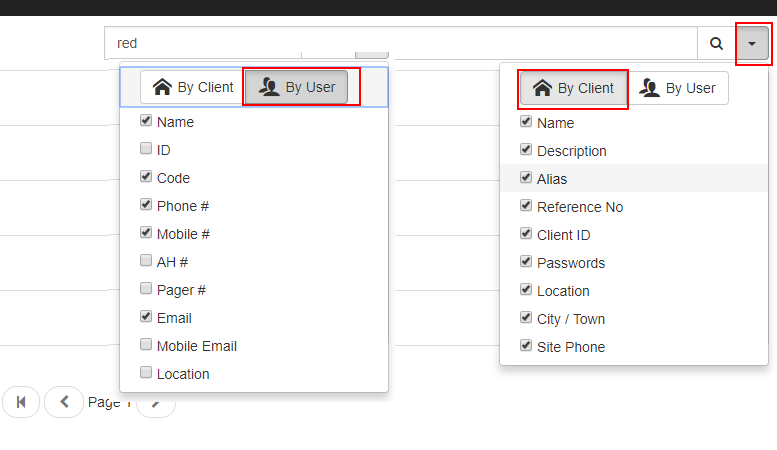
Advanced search formats can be used so you can search multiple terms at once. For example if our search for George returns too many results we can narrow down the list to our desired customer by searching for the client address as well, the search for this could be George Argil. Each search term separated by a space will search for different data. To search for data containing a space, wrap the term in quote marks like George "Argil St".

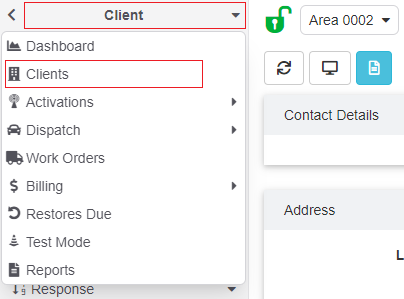
If you find a client and need to open a different area then the Area menu on the client can be used to quickly navigate to the correct account.

You can return to the global Client List window at any time by clicking Client then the Clients Button In the sidebar.
The Activations List
The Activations list can be selected at any time by clicking the 'Activations' button from the sidebar.
while in a client the activations option will be for the current client, use the dashboard popup navigation for the activations list of all your clients.

Current activations will take you to currently active and new activations, History will take you to completed activations.
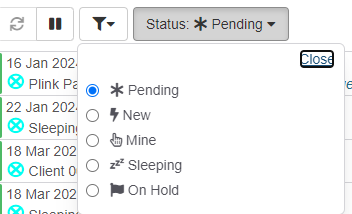
Current activations will be updated automatically, this can be paused by selecting the pause button at the top of the screen.
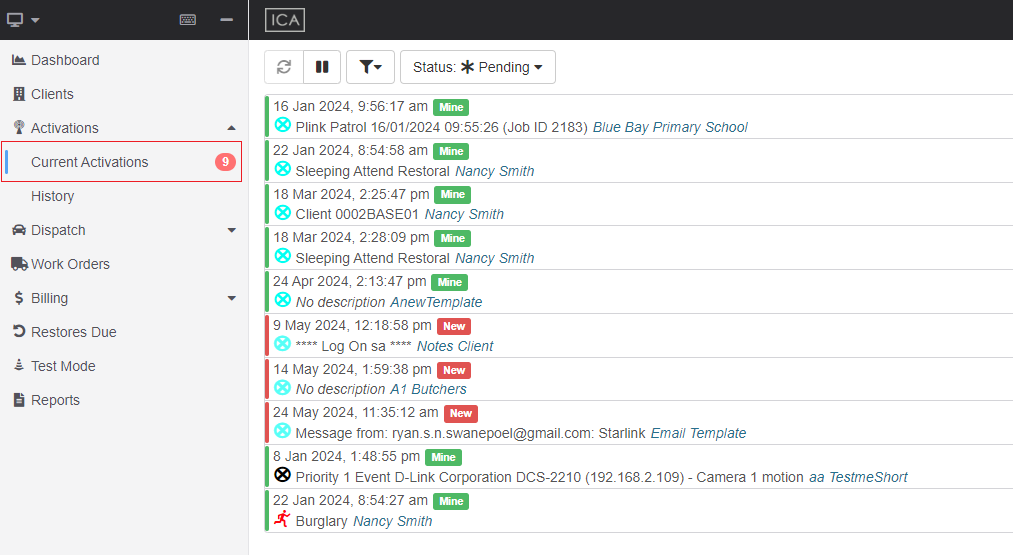
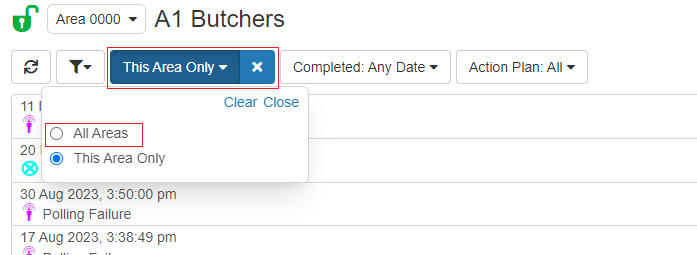
The filter buttons at the top of current activations allows you to filter these based on their status.
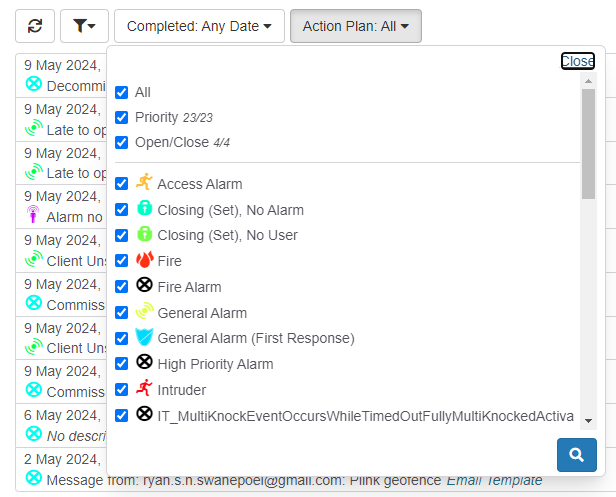
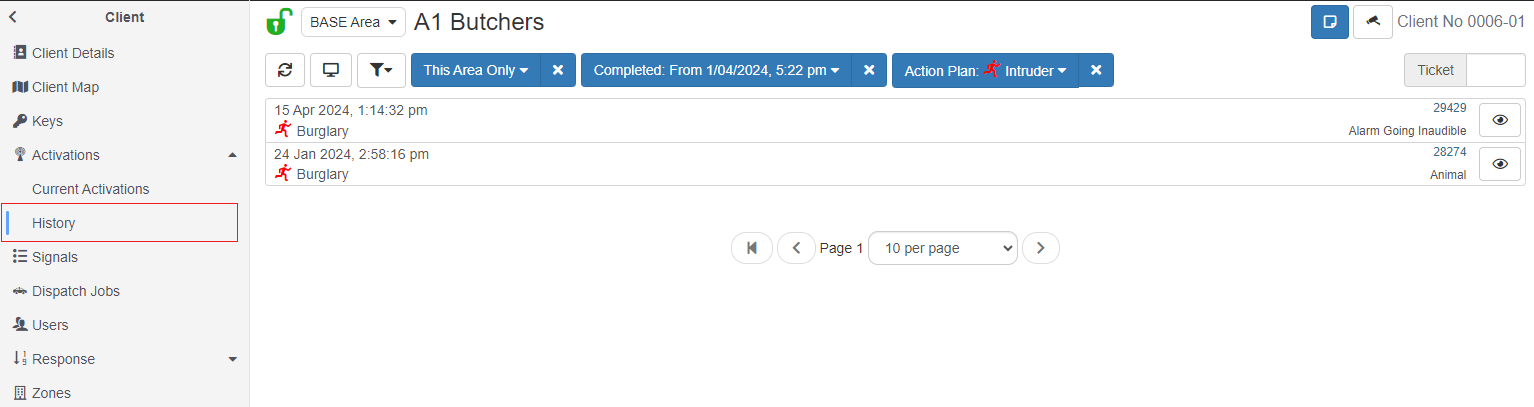
The filter buttons at the top of history allows you to filter these Activations based on time range, action plan, reason etc.
It is also possible to jump directly to an activation if you know the ticket number from either activations windows.
The 'Refresh' button on the left of the filter buttons will check for any new activations that fit the filter criteria and then update the Activation list if there are new Activations to include in the list.
You can select any activation by clicking on it and this will take you to the Activations window and show the operator notes, reasons and other details of the completed Activation.
The Workorders Menu
The Workorders menu item will take you to the global workorders list. This window shows all Workorders for all clients.
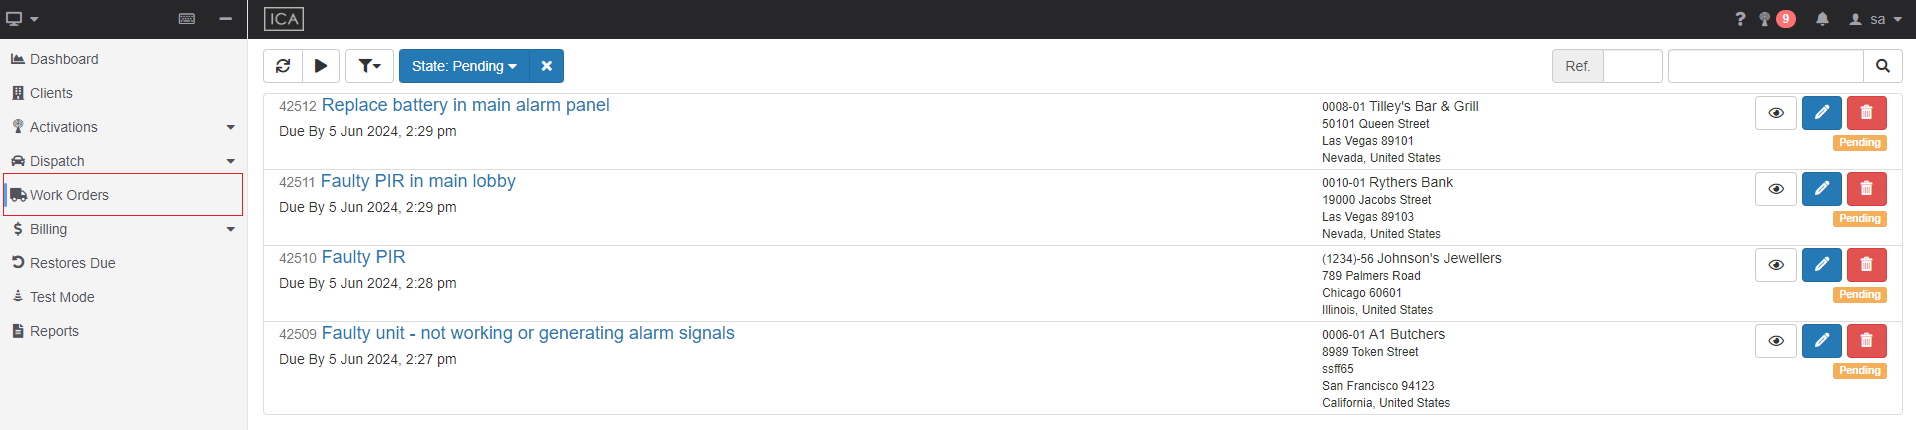
By default, this displays all the Workorders in progress. Add / remove the filters to view other work orders such as completed work orders.
Workorders that are overdue will be highlighted with an Overdue Tag.
Clicking on a Workorder will take you to the Workorder item window which is detailed below.
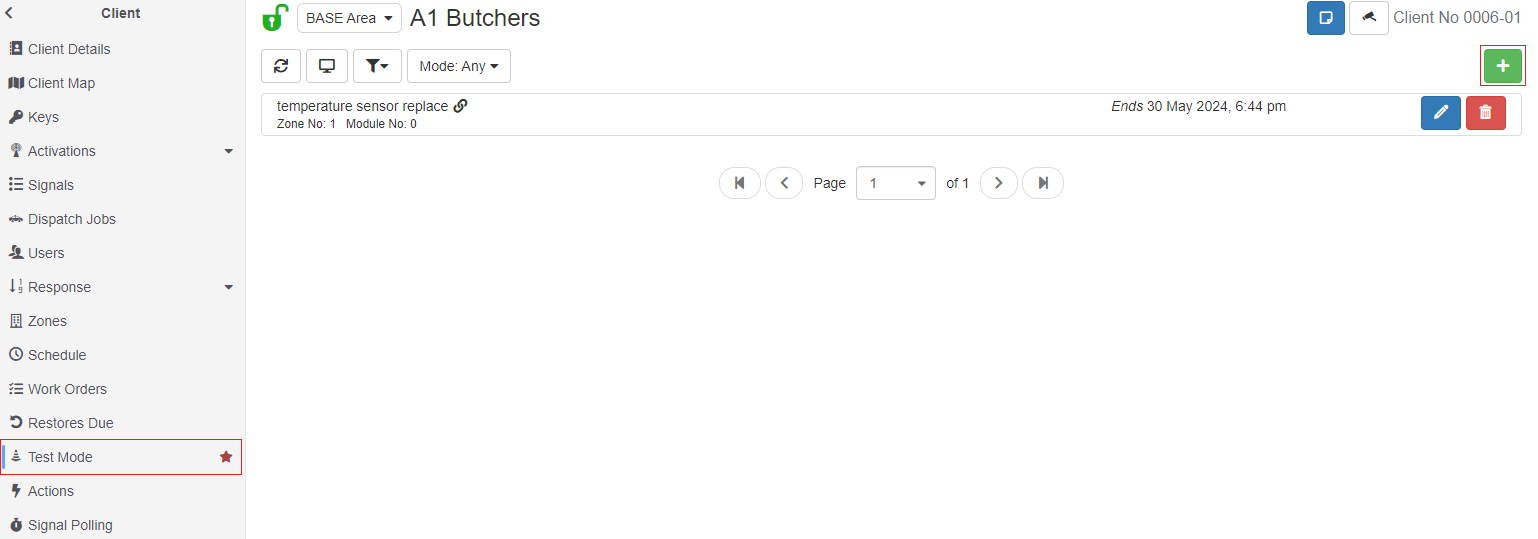
The Testmode Menu
The Testmode menu item will take you to the global Testmode list. This window shows all Testmodes for all clients.
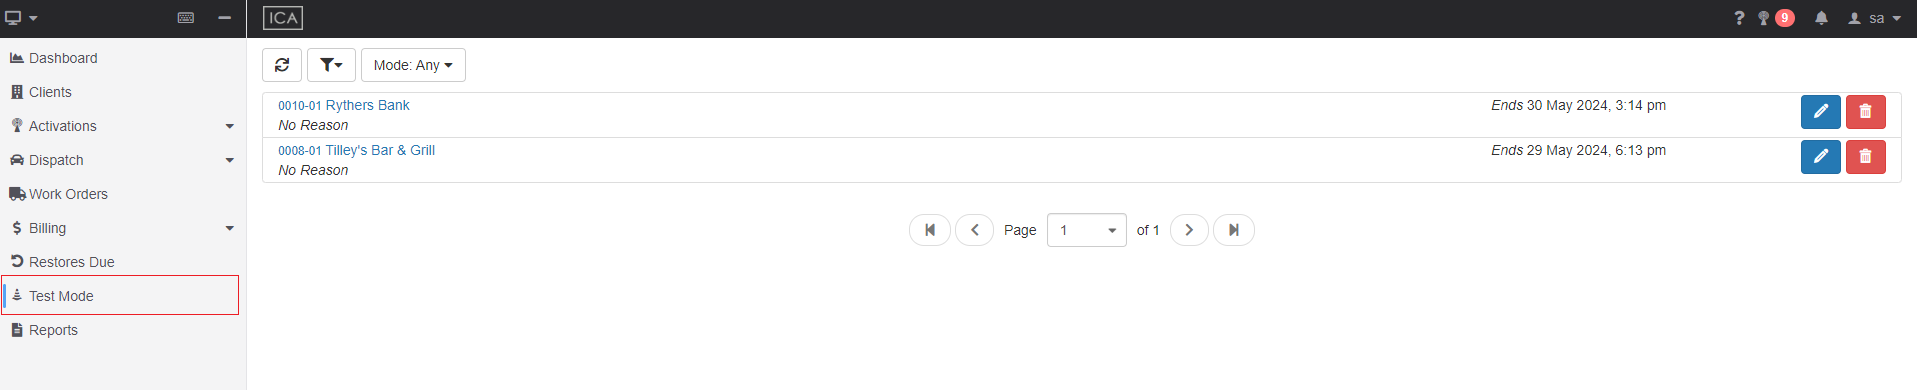
Clicking on the client name of the Testmode will take you to the clients Testmode tab.
Alternatively; clicking on the edit button of a testmode will take you to that Testmode's edit window, so you can update or deactivate the testmode.
The Reports Menu
Clicking the Reports menu item will take you to the global reports window. This will list all available reports.
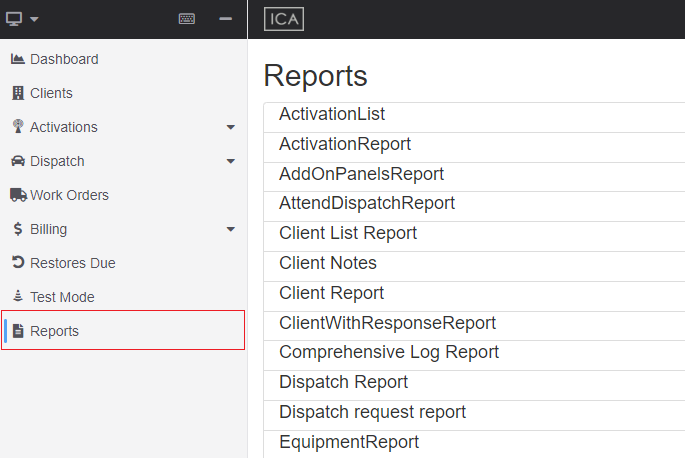
Clicking on the Report you want to run will take you to the reports generation screen. Here you can select the customer range, the order the report will be generated in (By name or Client ID) and allow you to select the output format e.g Excel, Word or PDF.
Reports will be saved to your computers local downloads drive.
Dispatch Menu
To view current Dispatch jobs, select the Dispatch Jobs menu item.
To create a Manual Dispatch Request click the Request Dispatch menu item.
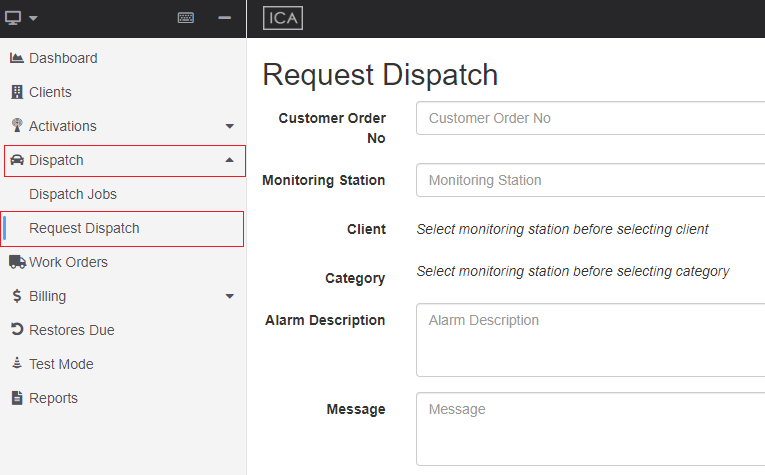
If you are dispatching to one station then you will see that station name logged into the details. If you can create dispatch requests to multiple Dispatch Stations you will need to select the correct station to send the dispatch to from the drop down list.

You can now search for and select the client that requires the patrol to be dispatched to. Use the filters to search for the account and then select the account by clicking the tick icon beside the account have in the search results list
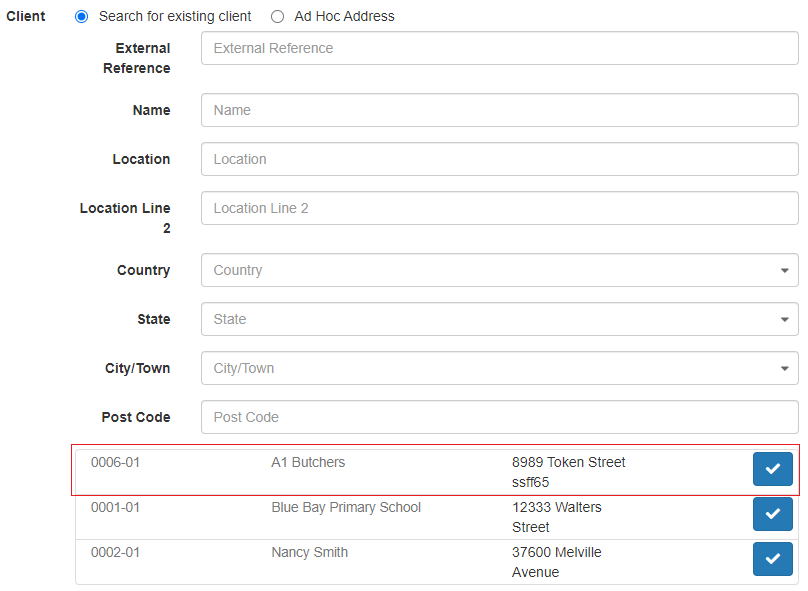
If you need to create a patrol dispatch request for a client that is not available in your client list you can enter an Ad Hoc name and address.
Enter in the customer order number, select a Dispatch Event Type and the Dispatch Job details
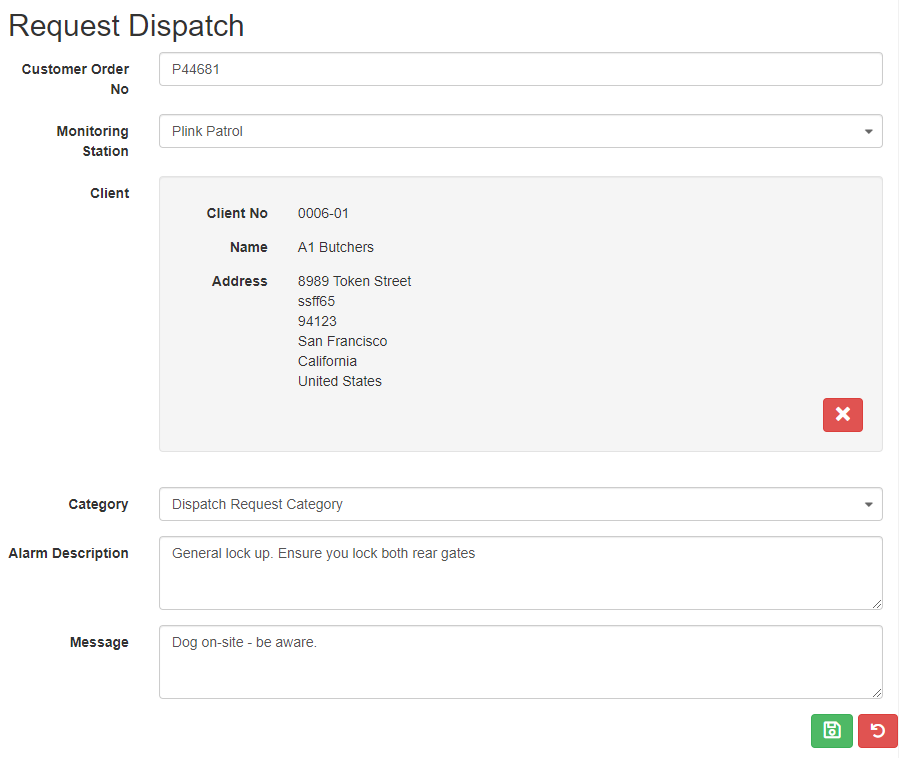
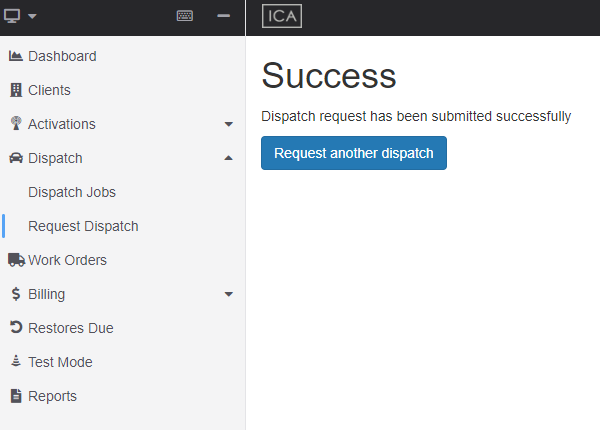
Click the green tick button to send the Patrol Dispatch Request. You will receive a confirmation that the request was sent successfully.
Client Tabs
The Client Menu
When you open a client or an Activation the sidebar will show you the Client menu.
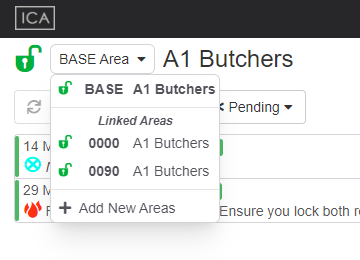
You can quickly skip to any other area of the client through the Area Menu which is displayed at the top of all the client windows.
Viewing a Clients Signals
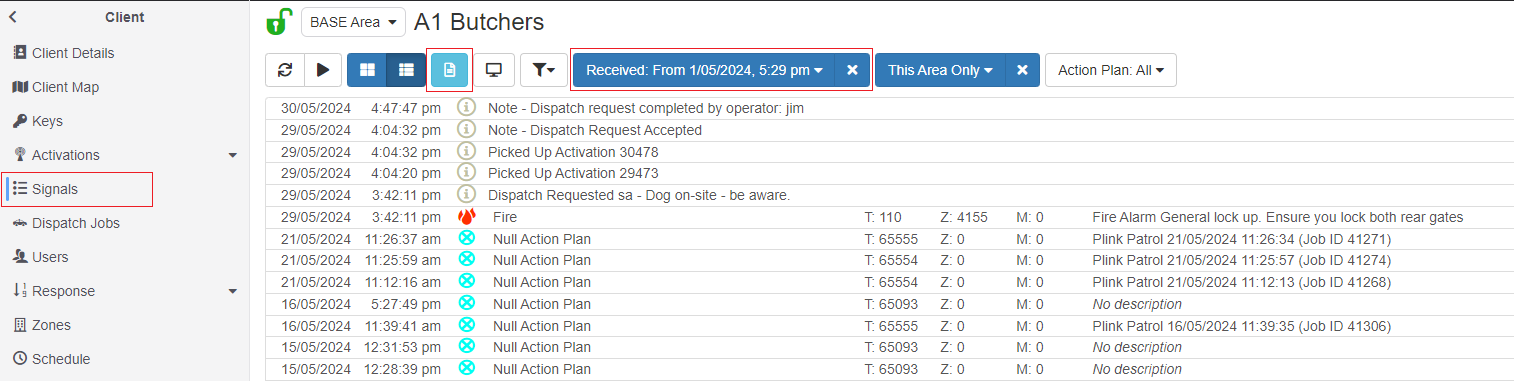
The signal history for a client is an up to date list of all the signals a site has received and can be viewed from the sites "Signals Window" which is shown by clicking the "Signals" tab in the sidebar.
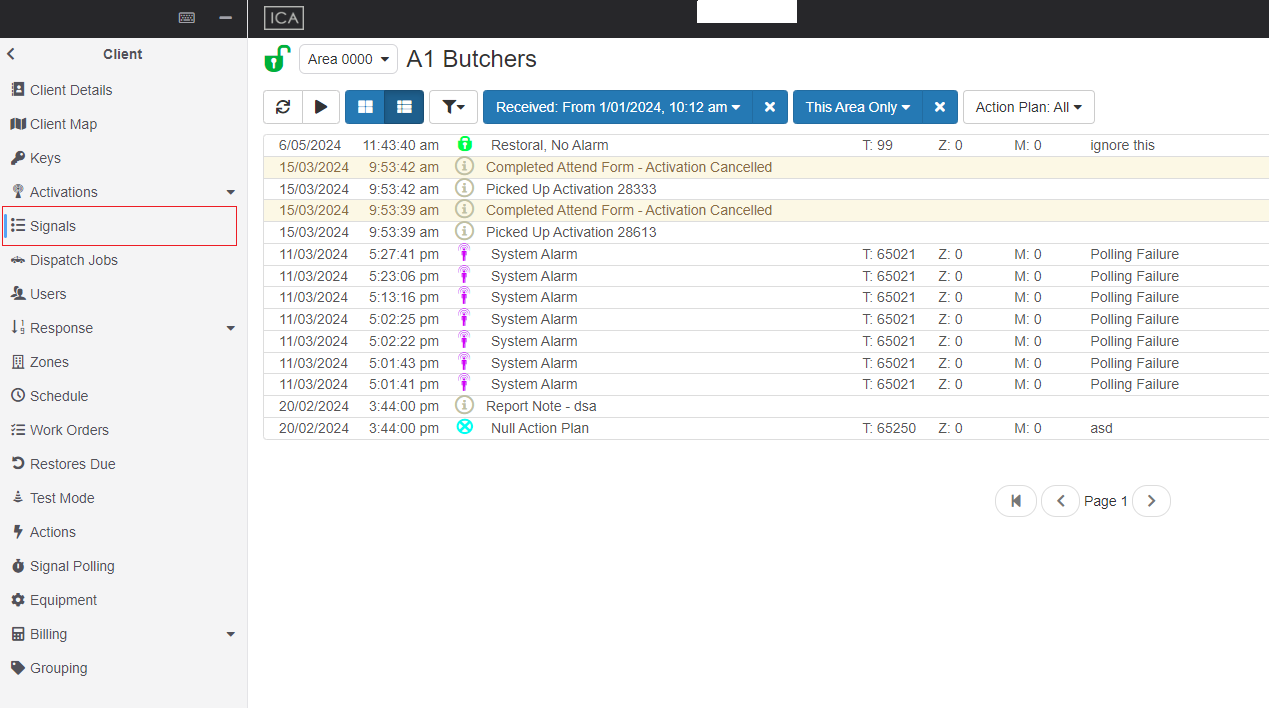
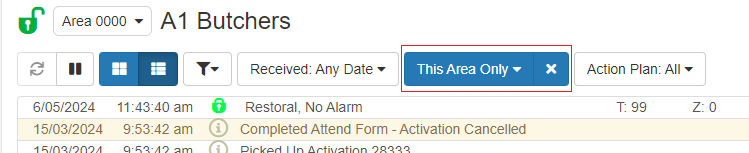
On Multi Area accounts you can choose to view just one areas signals or all areas signals.
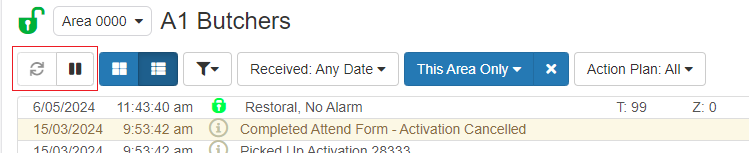
You can click the Pause button to stop new signals from showing in the list. You can then click the Refresh button to load any new signals in the list, or the Play button to resume the auto-refresh.
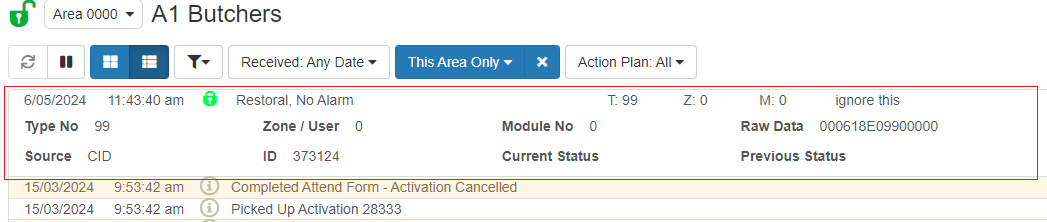
If you select a signal it will expand showing more details such as the raw data.
The search button on the right allows you to search the clients signal or raw data for phrases. This includes the signals of all areas of the client if you have selected to show signals from all Areas using the filter buttons.

You can further narrow down the results by using the Action Plan filter, the Time Range filter or a combination of both.
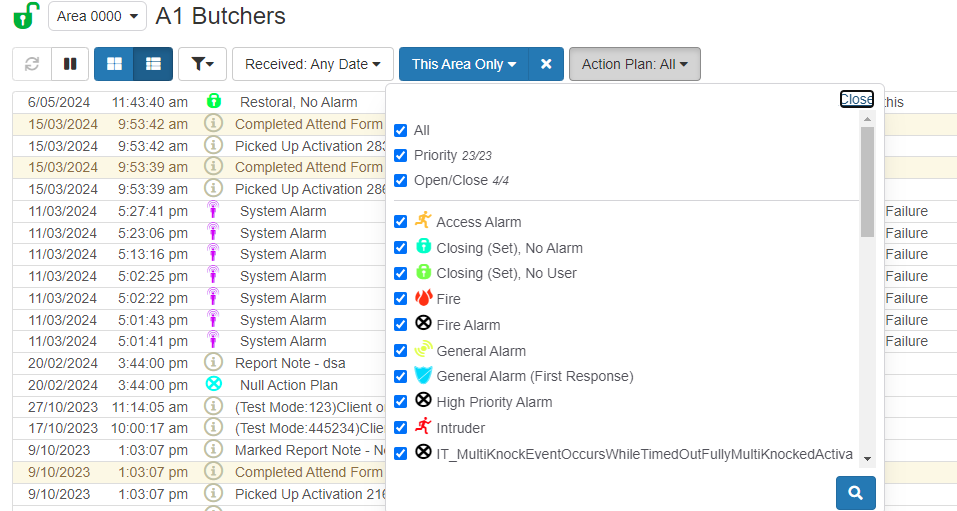
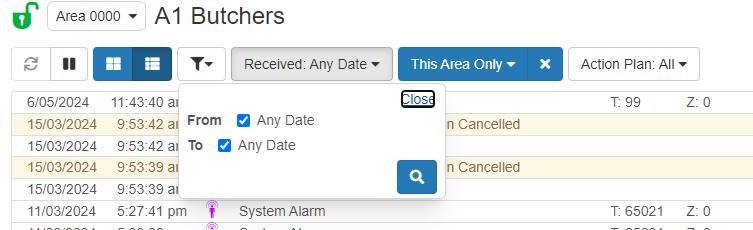
Filtering is disabled while auto-refresh is enabled.
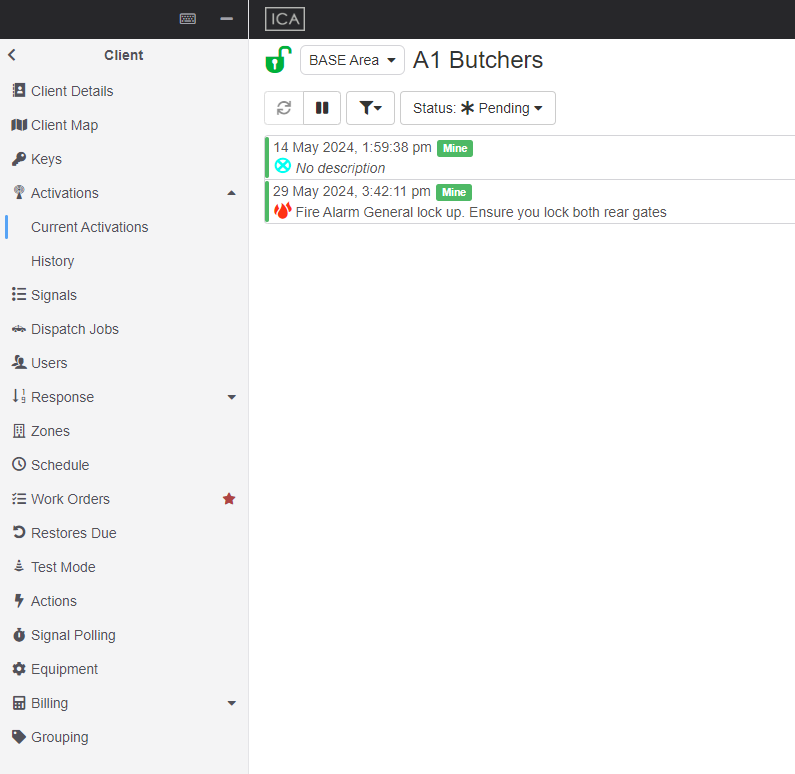
Viewing a Clients Activation List
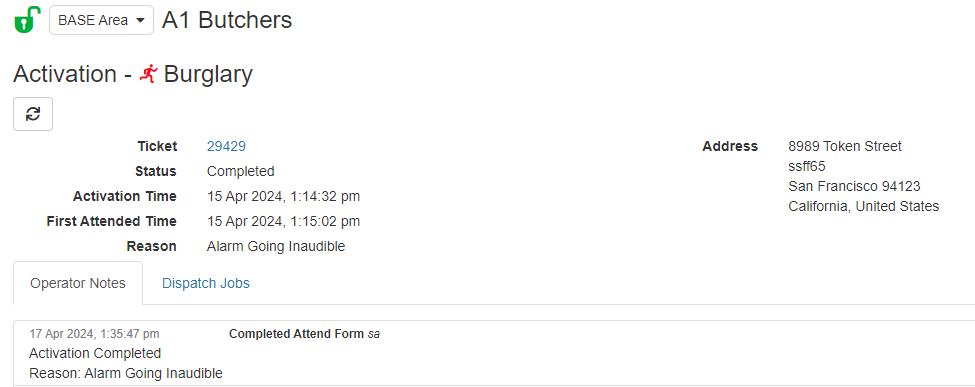
Selecting the Activations > Current Activations tab on the Client Menu allows you to view the active or new activations for the selected client / account.
Selecting the Activations > History tab on the Client Menu allows you to view the completed activations for the selected client / account.
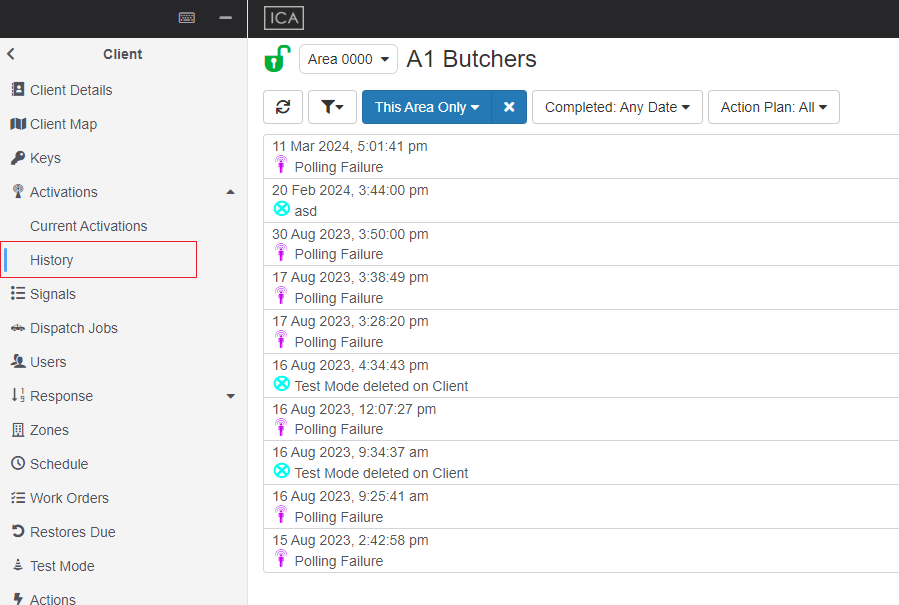
You can view Activations from all Areas of the client by selecting the 'All' option in the area filter.
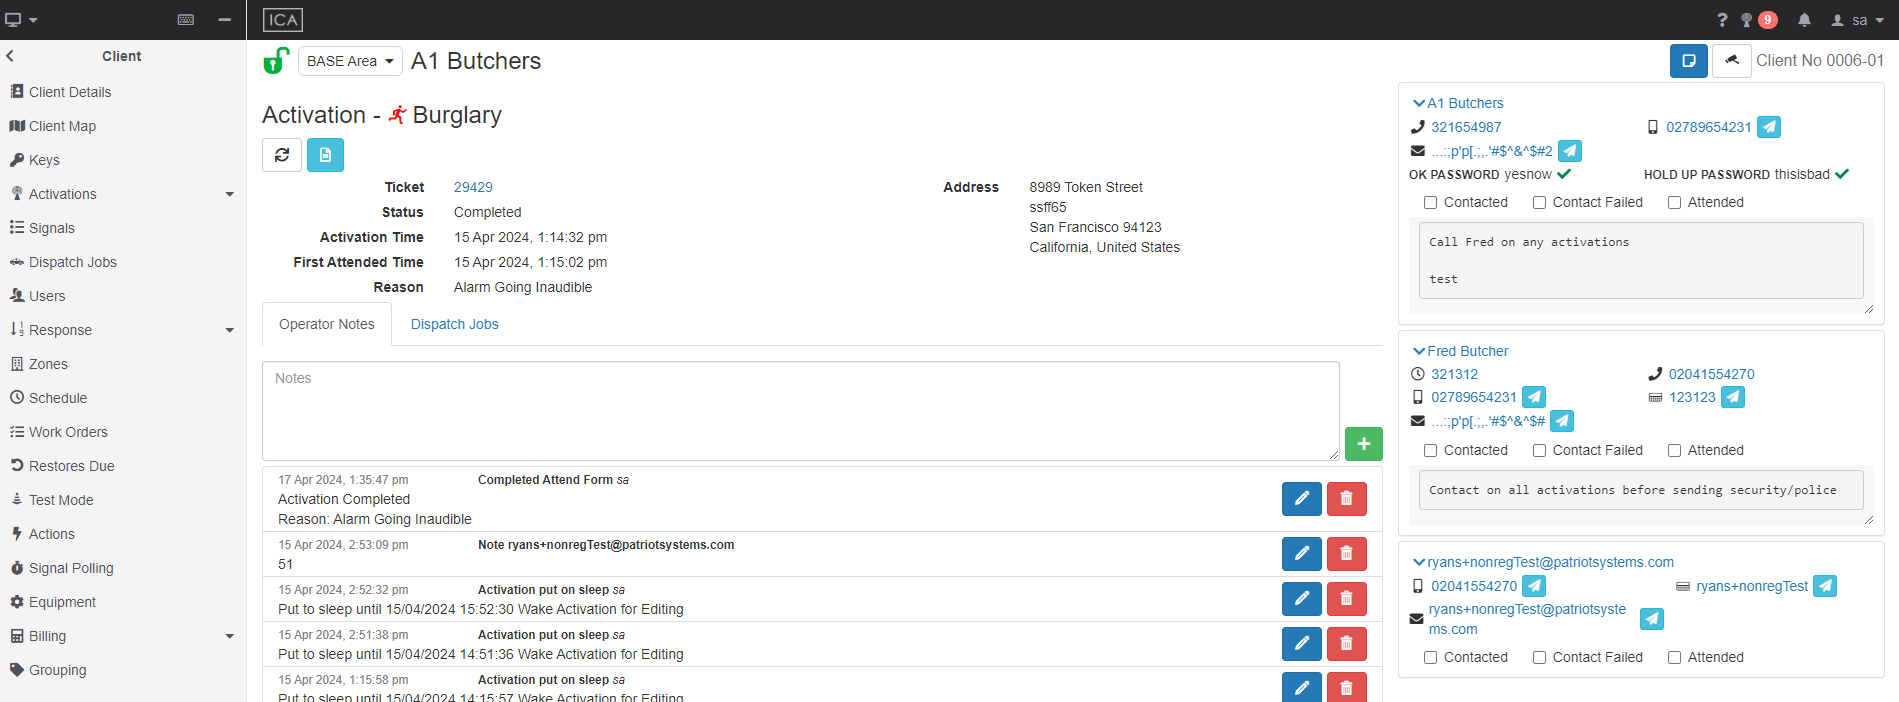
Clicking an Activation will load the activation details and operator response details and notes.
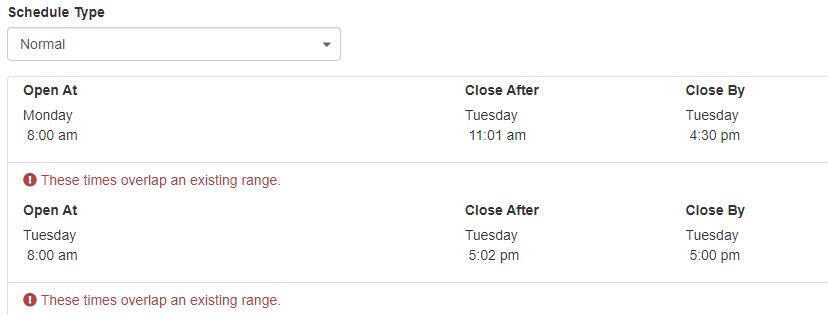
Viewing and Updating a Client Schedule
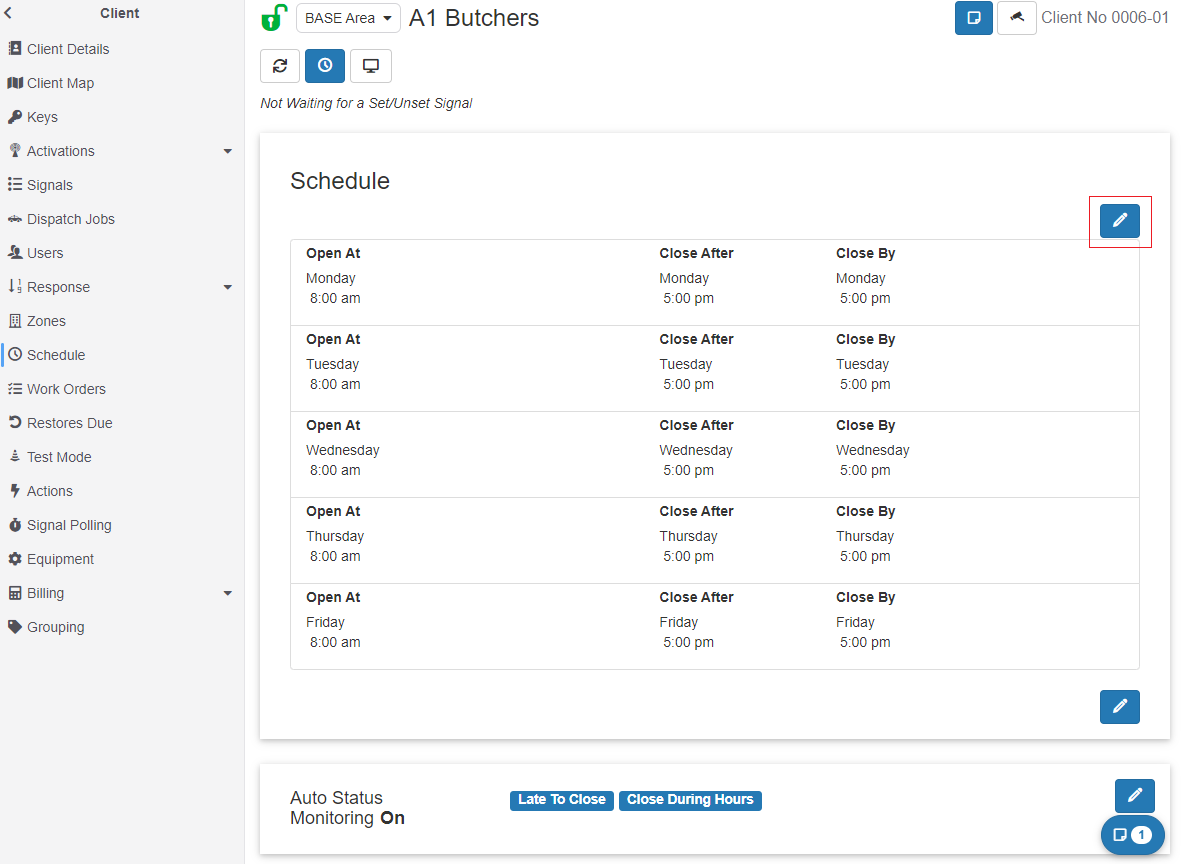
The Schedule window allows you to view the client daily monitoring schedule open and close times.
To edit the clients daily monitoring schedule, you must click the pencil icon in the top right of the schedule window.
Selecting a day allows you to change the times and days of both the open and close times of the site.
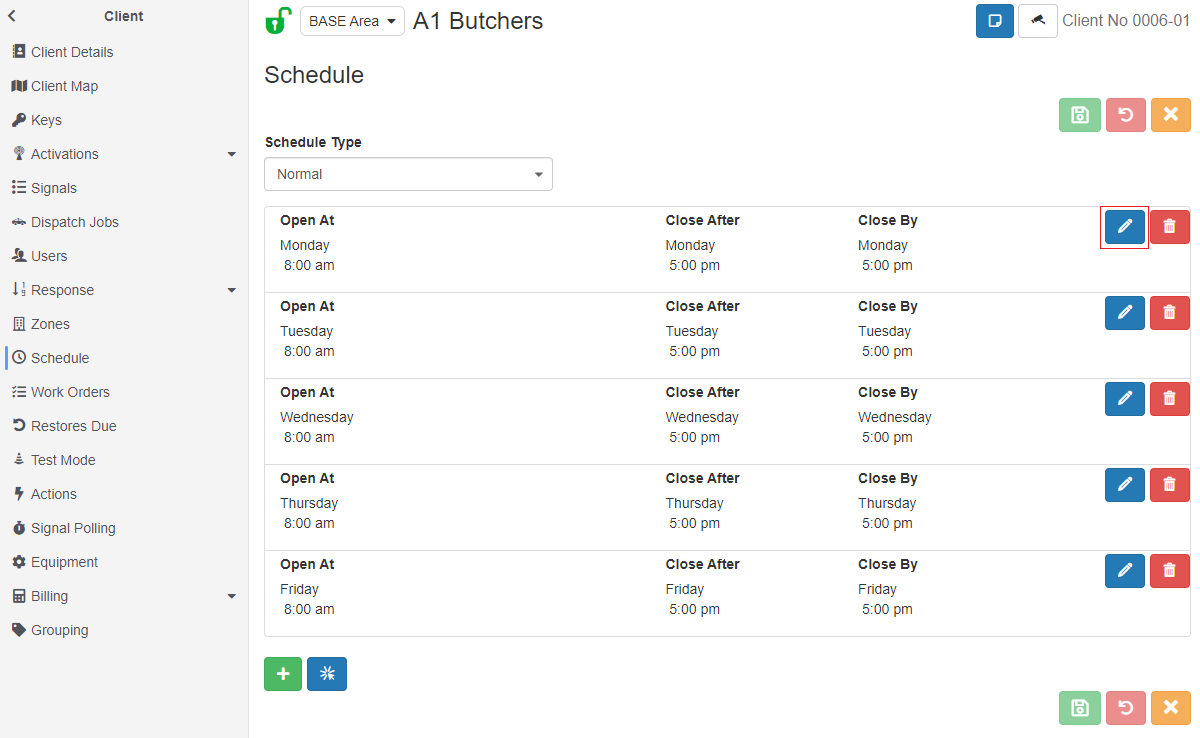
You can only edit one day at a time, you must save or cancel changes before editing another day on the schedule.

Incorrect schedules will provide a warning so you are unable to create conflicting open and close times.
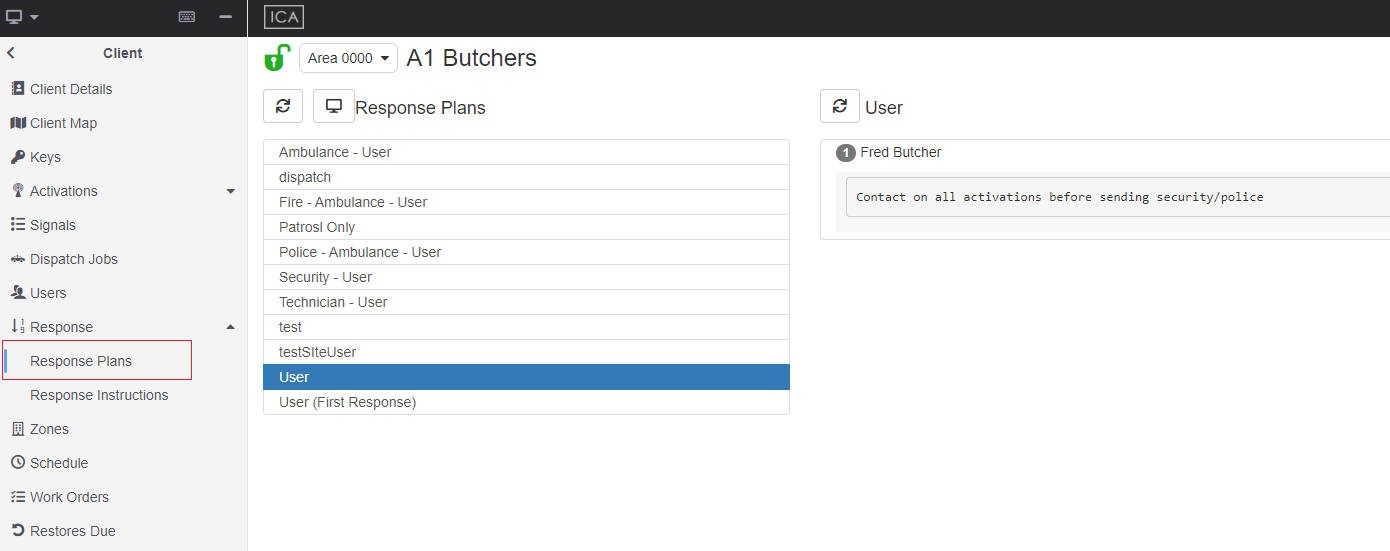
The Event Response Plan Window
You can view the Response Plans for different events from a client's Event Response Plan window. Select an event to view the Users in the Response Plan and the User order.
To edit a response plan, click the edit button in the top right of the response plans window. Not all response plans can be edited and you can only make changes by changing the individual Users Respond settings, Call Order and User Type from within the Clients User window.
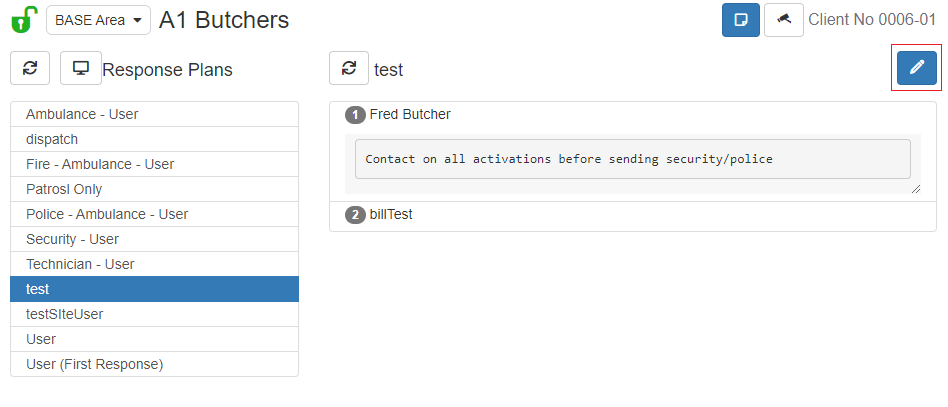
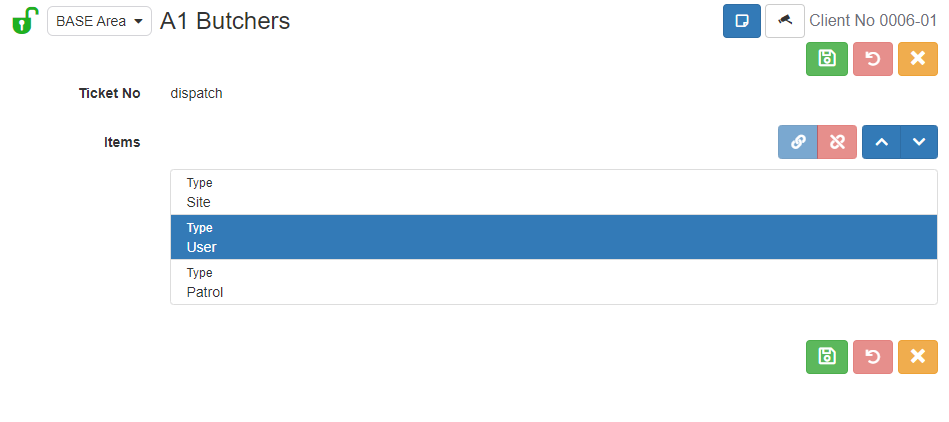
If the Response Plan is a client level response plan then you are able to edit the Response Plan from this Event Response Plan window. From here you can change the call order of the users on the response plan.
Viewing the Site Response Instructions
Response Instructions are the instructions that are shown for Operators to follow in the Site Instructions of the Response List. The Site Response Instructions are viewed in the Response Instructions Window.
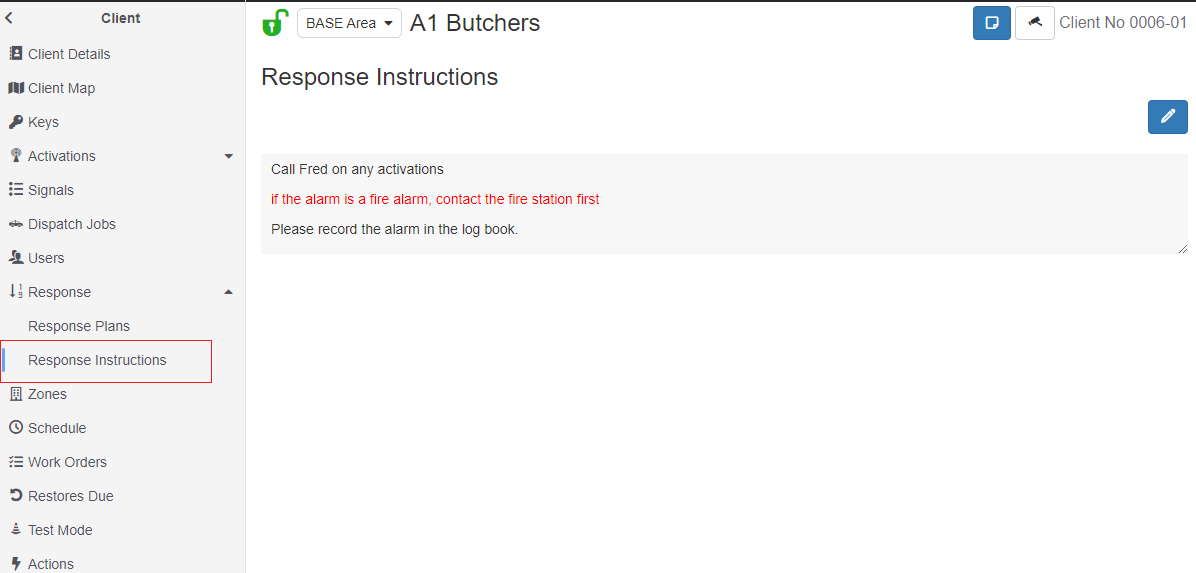
When the license is a Enterprise-level license, or Enterprise Response Module is included, the instruction can be edited by clicking the "edit" icon on the top-right corner. All the Markdown features that Patriot support also applies here.

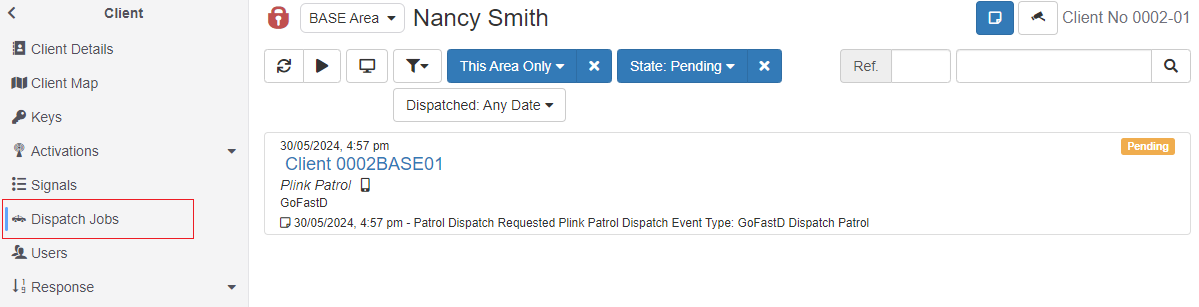
The Dispatch Window
Selecting the Dispatch Window will show all the Patrol Dispatch Jobs that are in progress or have been completed for the account. By default the filters will be set to This area only and Pending dispatch jobs.
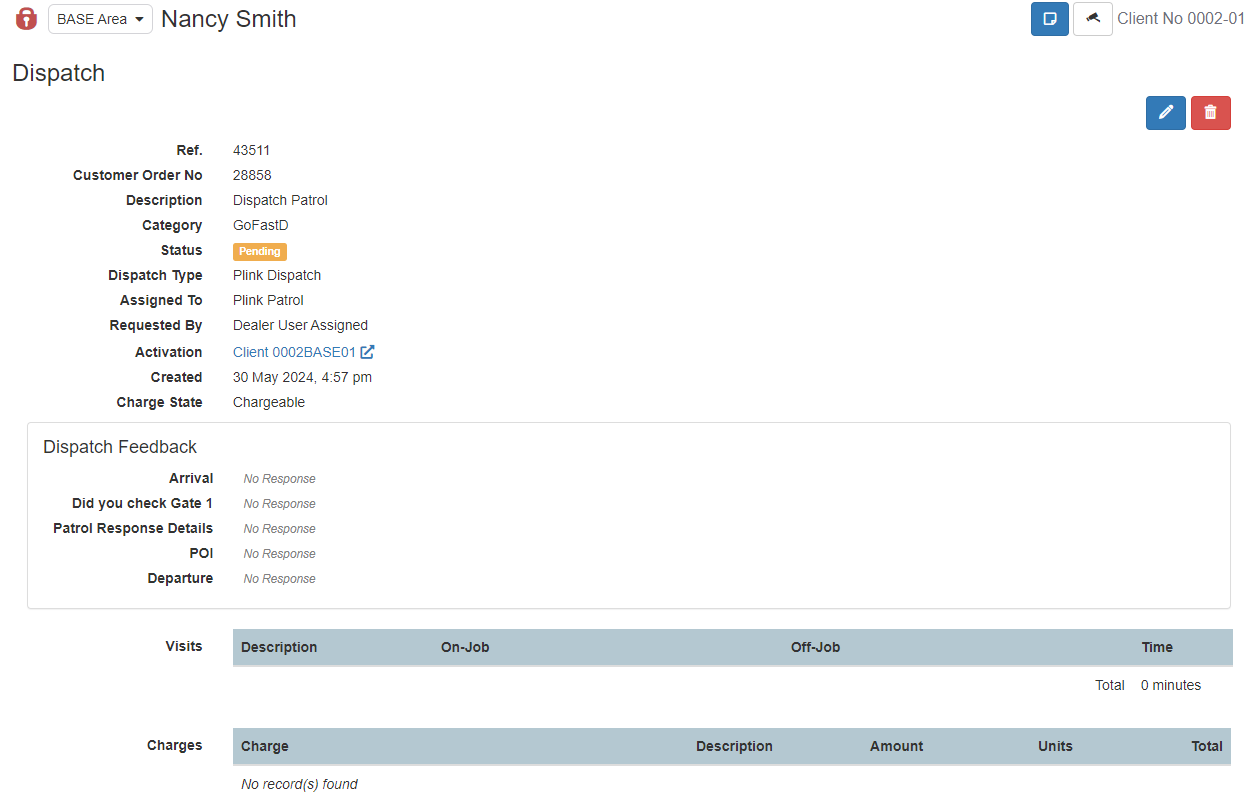
Clicking the Dispatch Job will take you to a breakdown of the Dispatch Jon which will show the status, notes, on Site / Off site times, photos, dispatch/Job number and other details relevant for the Patrol Job.
Workorders
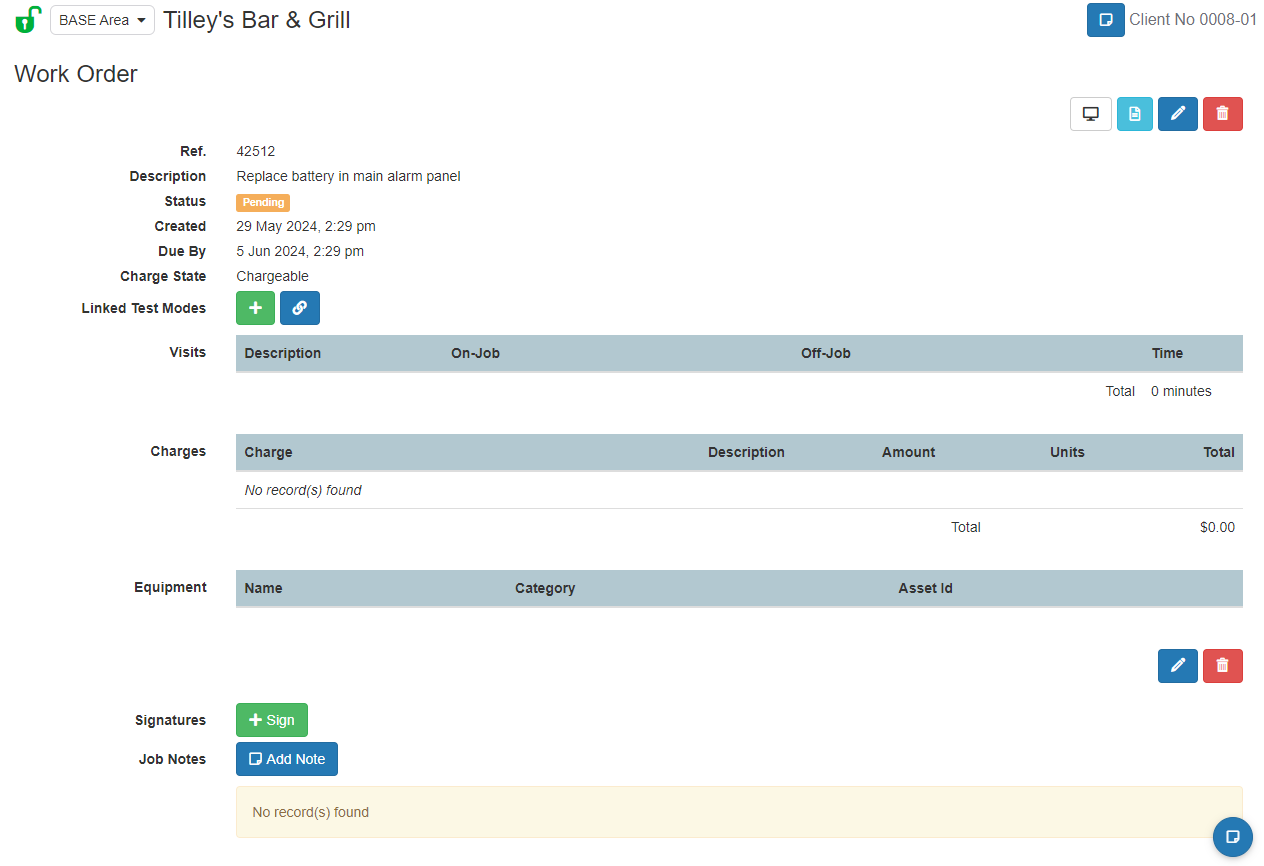
Selecting the Workorders window will show all the workorders for this client. By default the filters will be set to pending work orders for this area only.
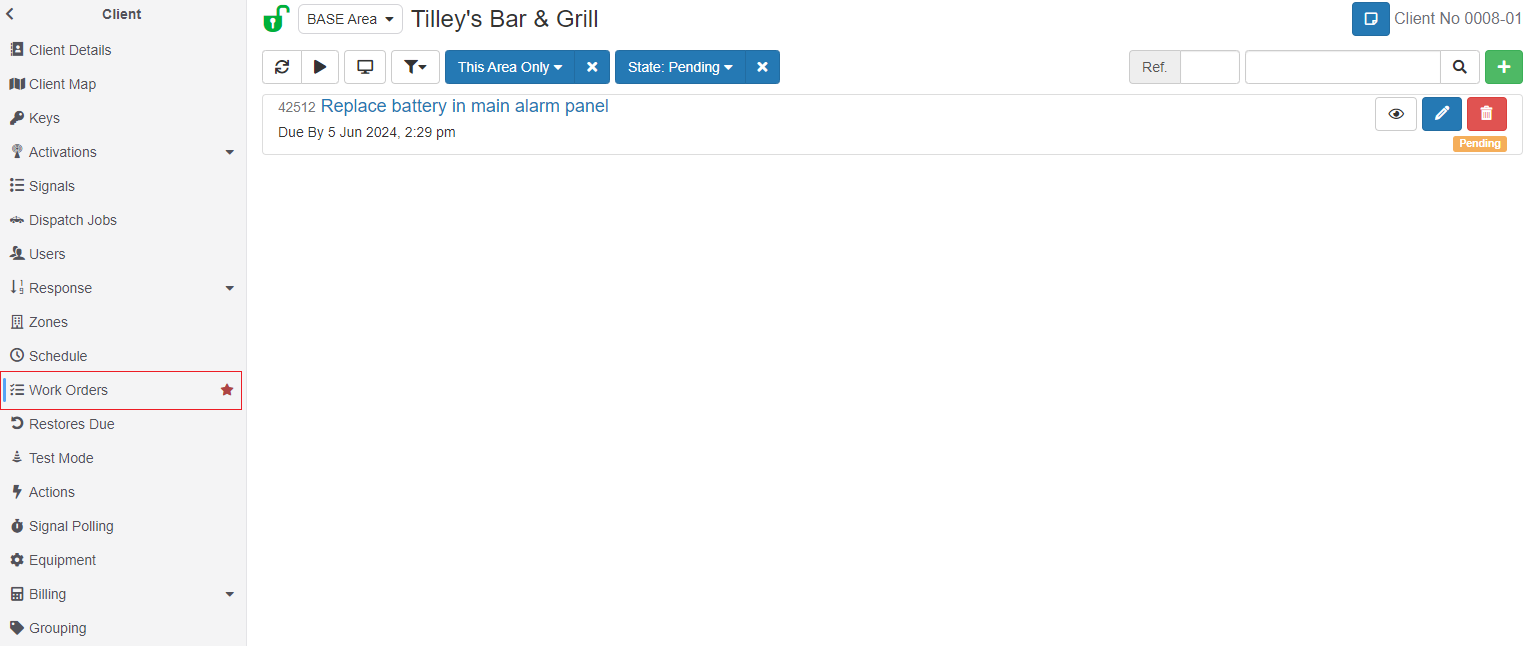
Clicking on a work order will take you to the workorder view window. Here you can see all the details about the work order and any notes that have been added.
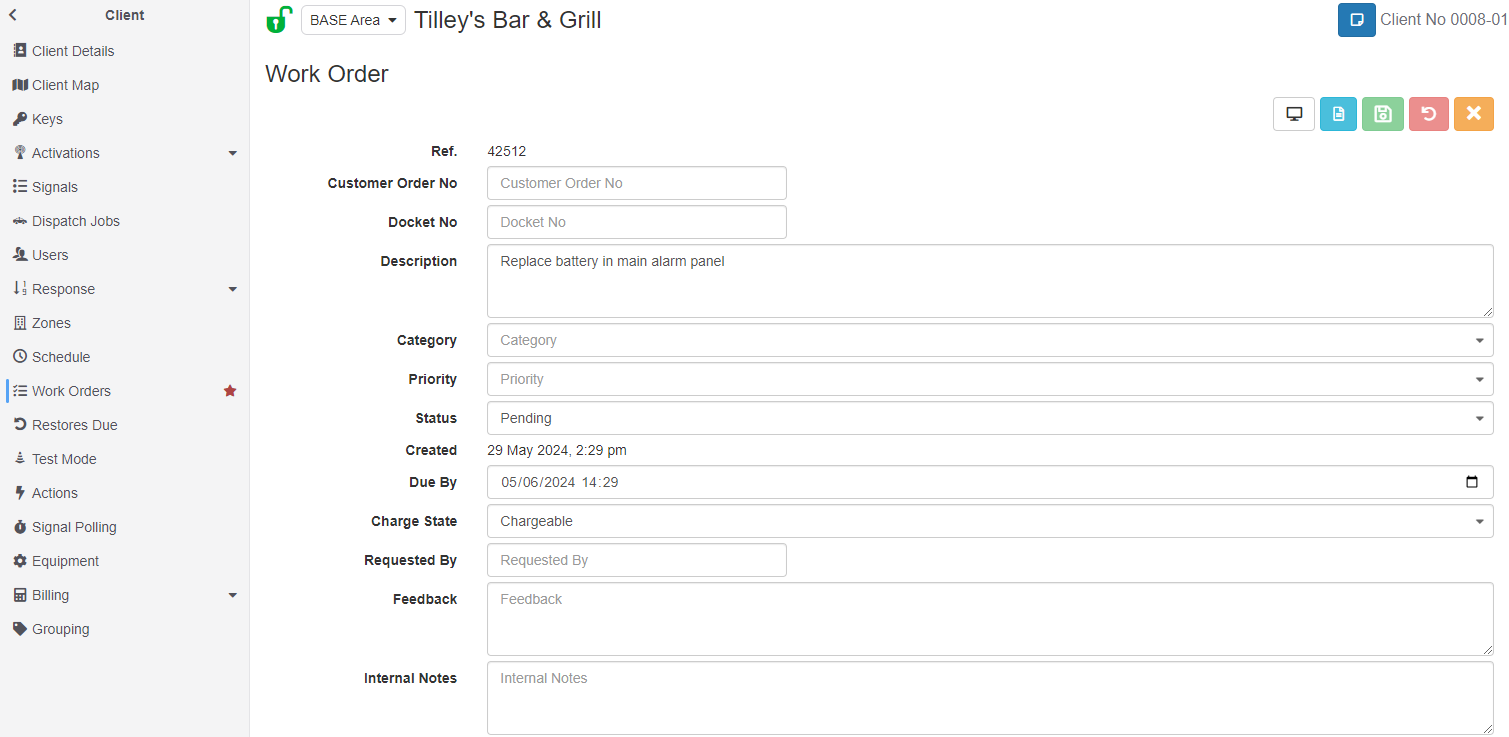
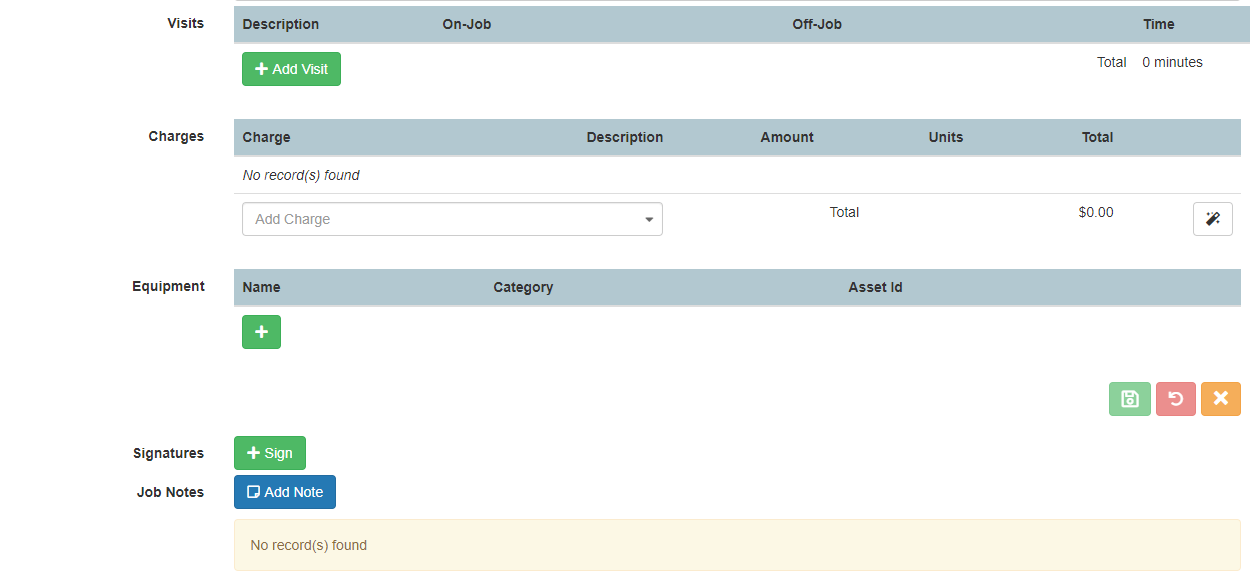
To edit the workorder, select the edit button in the top right and you will be taken to the workorder edit form.
The Actions Window
The Actions Window of a client allows you to action Panel commands.
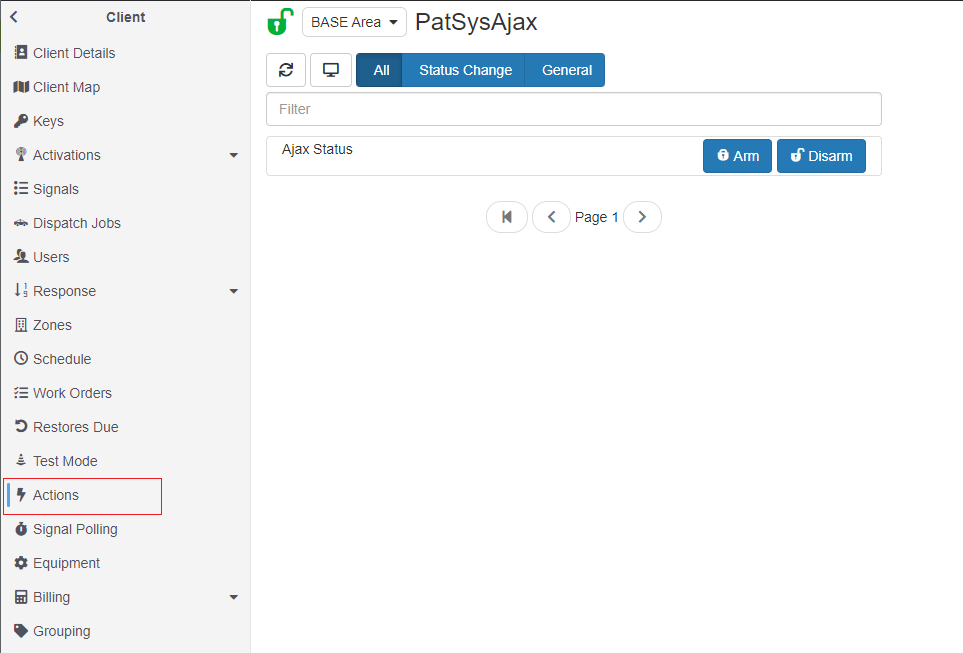
Depending on the type of panel and configuration you can arm / disarm the panel, control lights, doors and gates.
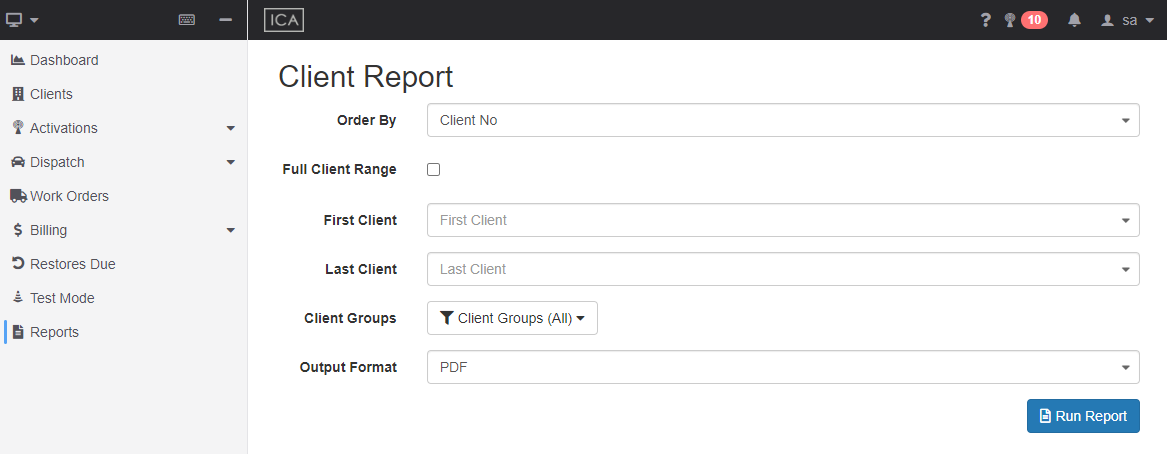
Accessing Reports
Creating a Site Report
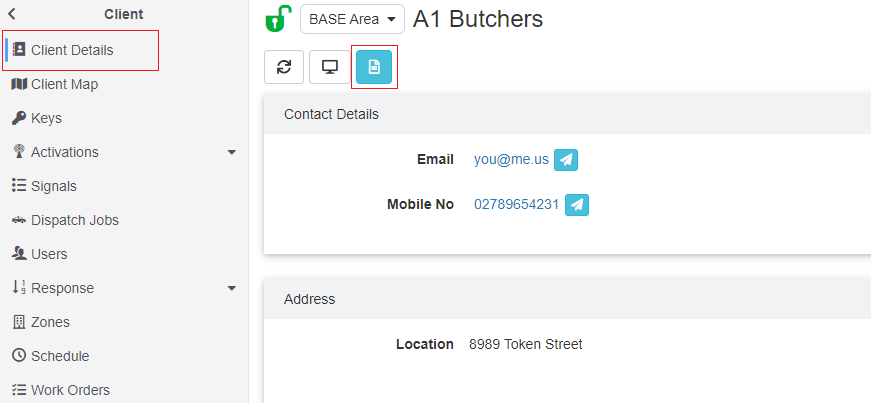
Site reports are accessible in the Client Details Window and can be saved as PDF, Excel or Word files. The two reports available are the Client report which lists all the details such as contact details, Schedules and Users of a site. The second report is the Client and Response report which provides the client details and their response details for the different types of events.
When you generate a report it saves to your computers default download folder.
Creating an Activation Report
Activation reports are available once you have selected a completed Activation and are in the Activations window.
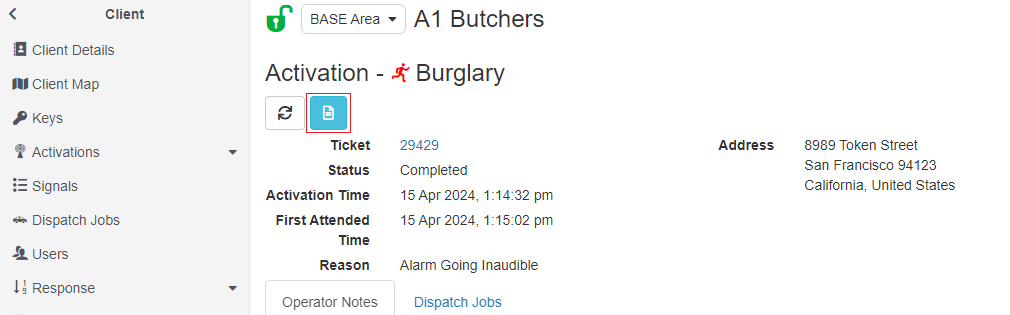
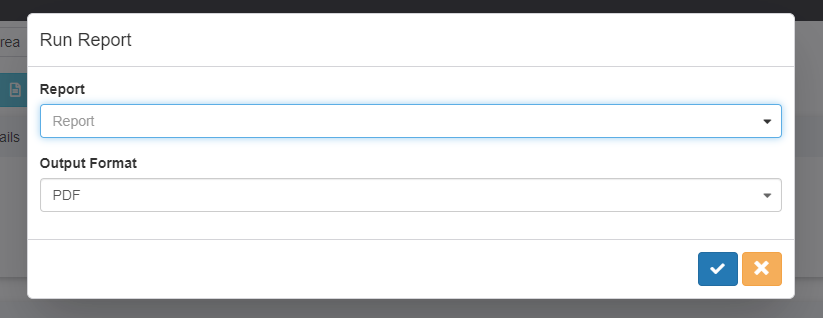
In the Run Report popup you can select which type of report you would like to run on this activation. Then you can select which file type to save as.
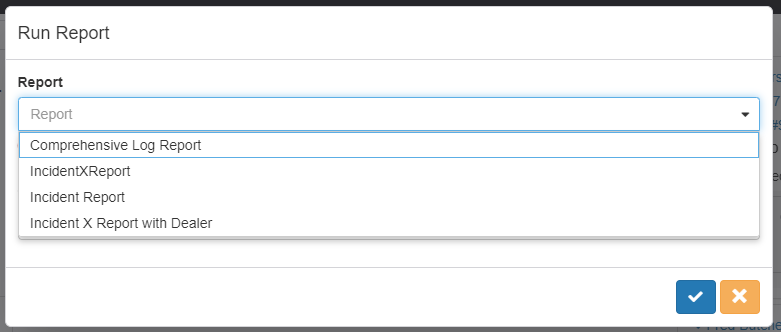

When you generate a report it saves to your computers default download folder.
Creating a Signals Report
Signal reports are accessible in the Client Details Window. Click the Report button shown below will generate a report based on the Filtered date range.
You must enter a date range in the signals filter option before creating a report.
Signal Reports can be saved as PDF, Excel or Word files.
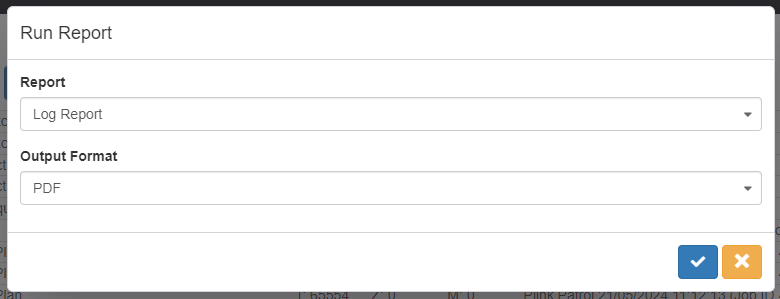
When you generate a report it saves to your computers default download folder.
Editing and Additional Features
Creating a New Account
To create a new account go to the Client Menu. If you have authority to create accounts you can click the insert button at the top left of the screen.
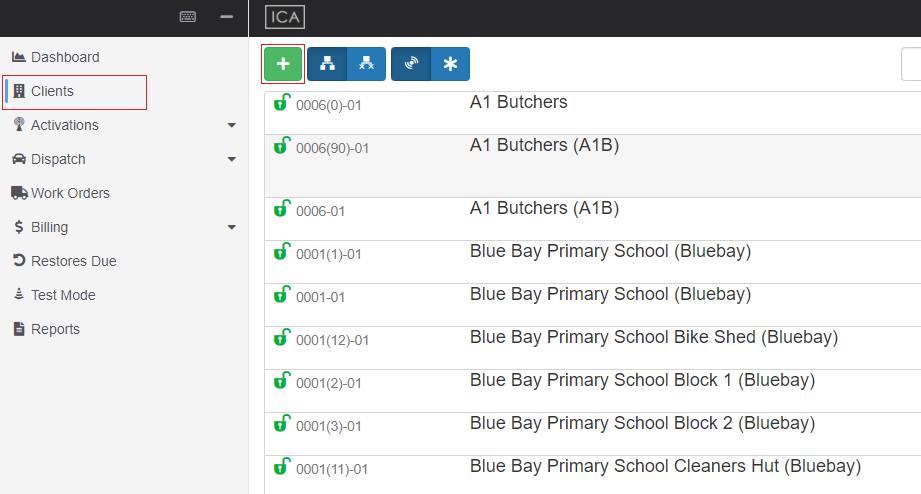
You will prompted to enter the New Client Name, a Client ID ( or you can search for an available one ), a PORT ID and to select a New Client Template.

Once you click the green tick button the new account will be created and the client details can be filled in through the various account tabs.
Putting a Zone on Test Mode
When a Technician needs to put just one zone on test they can do this through the Zone List window of a Client.
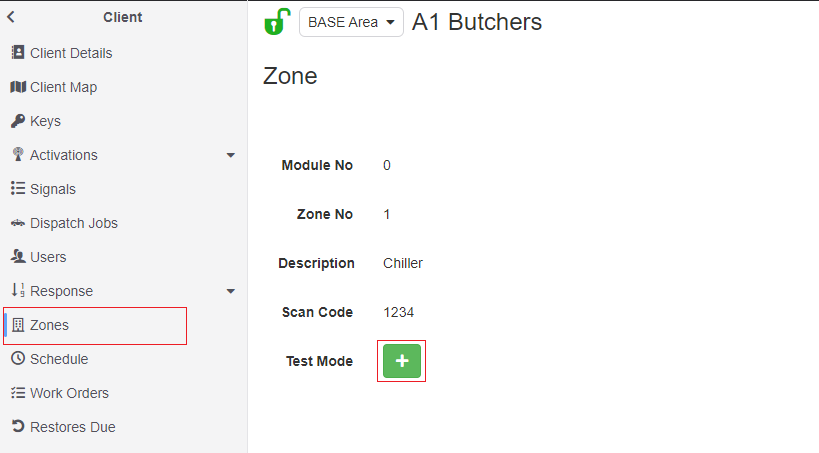
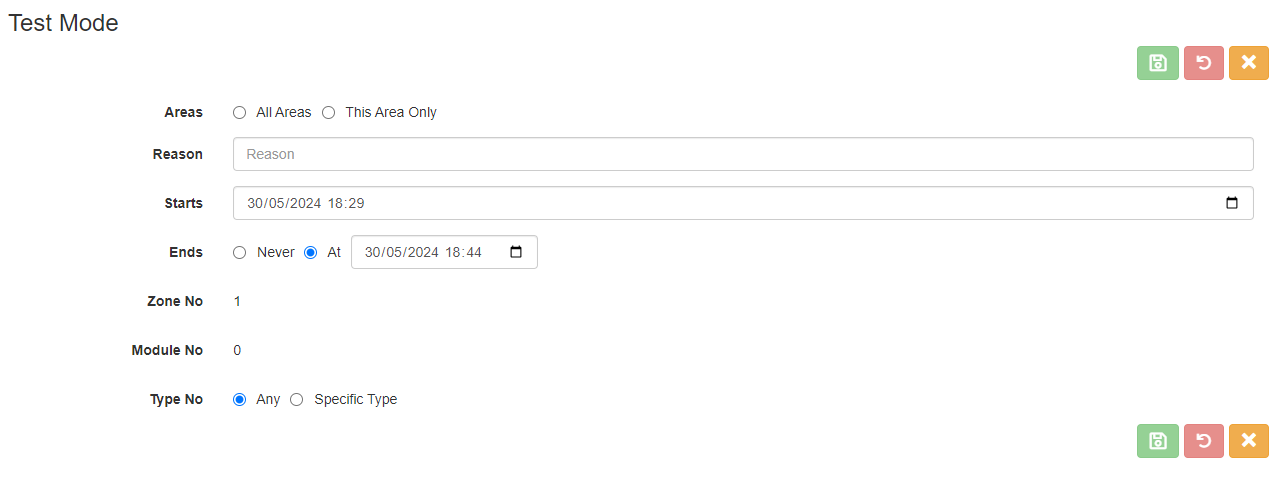
You can stipulate the start time and length of the test mode as well as if it is for one area or all areas of the client.
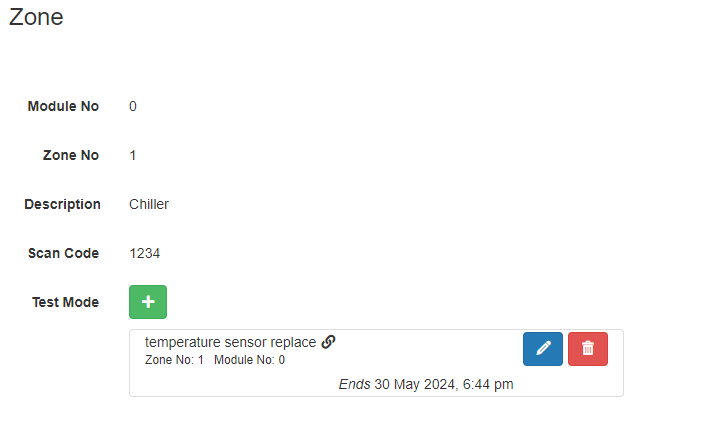
Zone test Modes are viewable and able to be disabled from the Zone or from the Test Mode window of the client.
Adding a NFC Scan Code
If you need to add a new NFC Scan Code into a client this can be completed by editing an existing zone or while creating a new zone.

In the Zone editor form you can enter the Scan Code in the Scan Code section.

After the zone is saved then it is ready for a Patrol to scan the code using the Plink app and have the Scan log into the accounts history.
Zones can also have Geofence locations see Zone Location for set up instructions.
Patrol jobs with geofence zones require Plink 11 or newer to be picked up by the patrol.
Putting a Client on Test Mode
When a Technician needs to put a site or an area on test they can do this through the Test Mode window of a Client.
You can use the insert button to enter a new Test Mode and stipulate the start time and length of the test mode as well as if it is for one area or all areas of the client.

You can create multiple test modes if required.
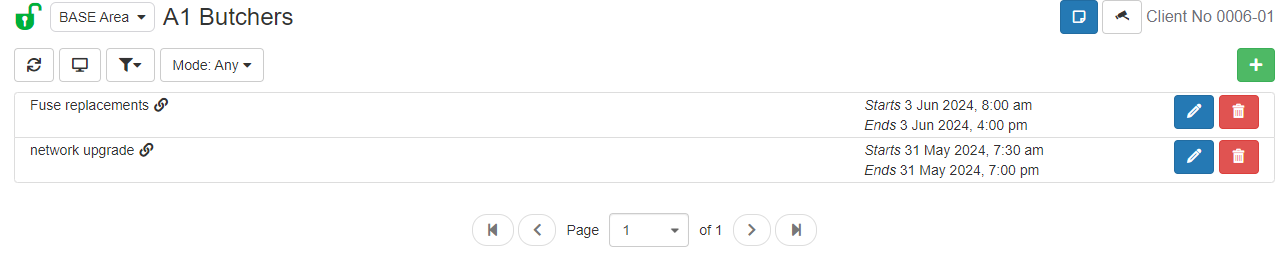
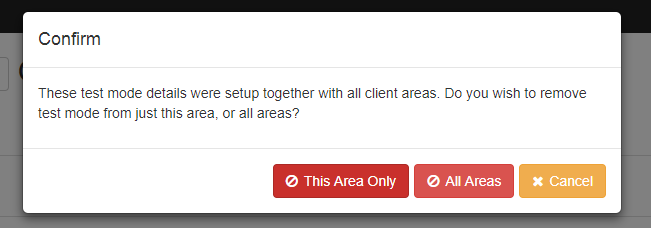
To delete a test mode click the 'disable' button next to the Test Mode entry you wish to remove.
Test Modes that are for multiple areas will provide a warning to the operator before the test mode can be removed.
Adding a New User
To add a new user as either a panel user or a Response User go to the Clients User window and click the insert button.
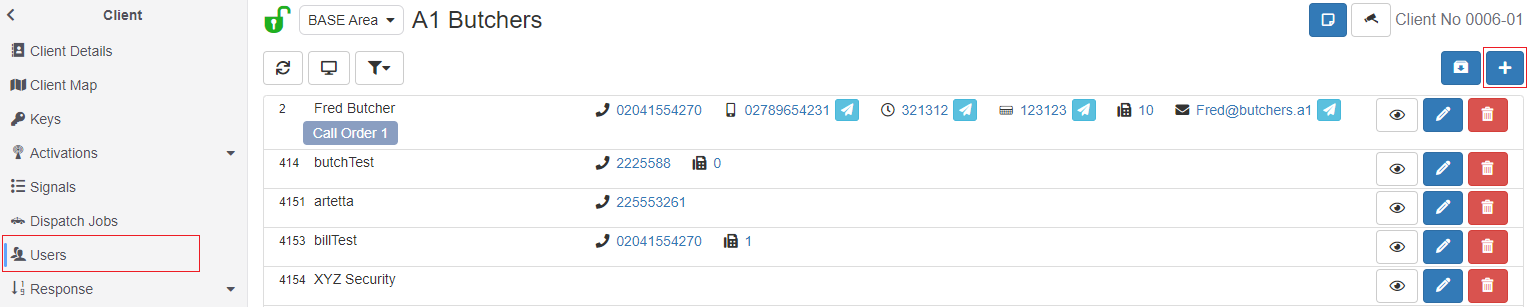
You can then enter all the standard details for the User such as their name, contact details, code and address. If a User needs to appear on the Response List make sure the User is selected as a "Respond" User, has a Call Order and has the correct User Type.
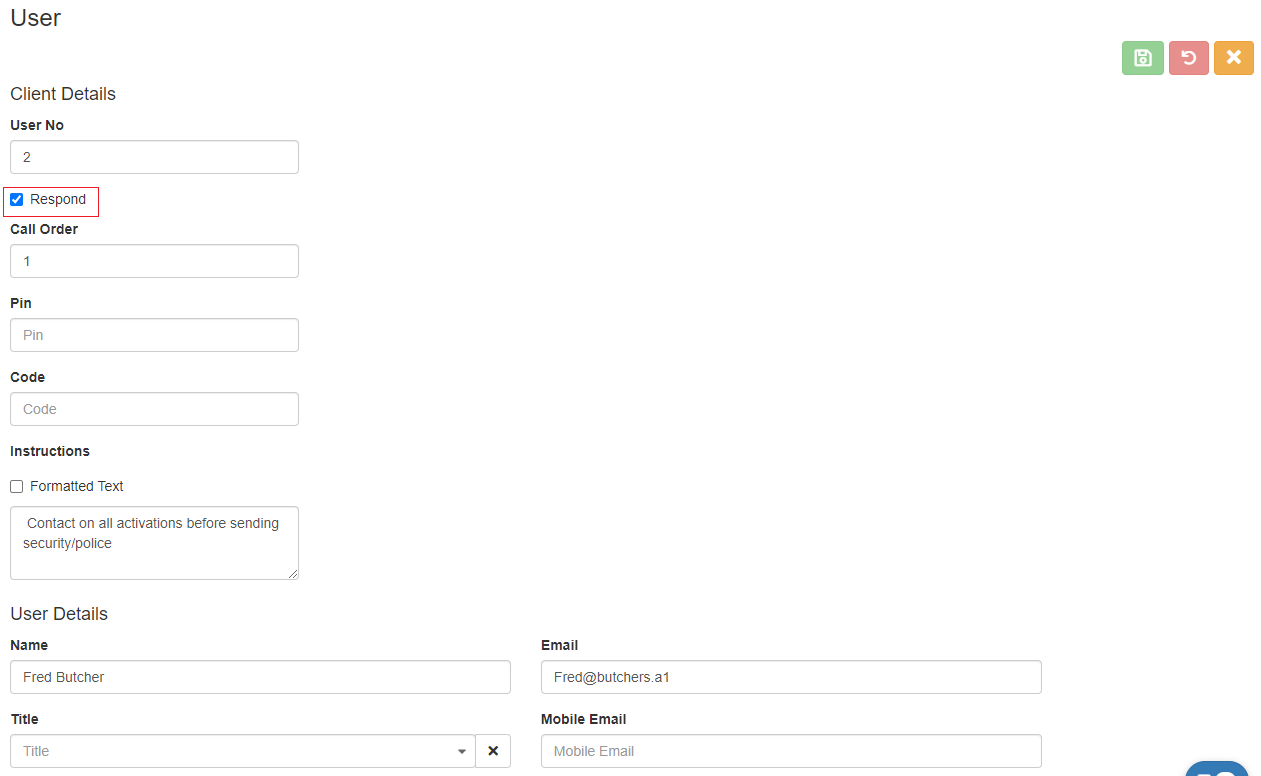
Once you have updated the User as required; click the "save changes" button at the top right or bottom right of the page.
Users that are generated and selected as a 'Respond' User will now show in the Response Plans their User Type are associated with or can be added to Client Level Response Plans.