Avigilon
Prerequisites
-
A Patriot License with the Avigilon Module
-
The Patriot Avigilon Task Component Installed
The Patriot Avigilon Task Component must be installed on each computer running an Avigilon Task.
- Current Version: Patriot Avigilon Task Component V2
- for 6.12, 6.12.32.11+
- for 6.13, 6.13.4.0+
- Previous Versions: Patriot Avigilon Task Component V1
- for 6.12, after 6.12.1.1 and before 6.12.32.11,
- for 6.13, before 6.13.4.0
- Current Version: Patriot Avigilon Task Component V2
signalling is not supported in V1.
-
The Avigilon ACC SDK Redistributable must be installed or it's component files installed into:
The Client Folder of each workstation running the Patriot Client, that will view the Avigilon CCTV, needs to have the Avigilon client files manually copied in.
This folder is normally C:\Program Files\Patriot Systems\Patriot Client\
Download the Avigilon Client Files. The latest version of the Avigilon ACC SDK is version 6.14 which is compatible with Avigilon ACC v5.* - v7.*
The Avigilon ACC SDK files have the following dependencies:
Setting up the NVR and Cameras
Patriot connects to the remote site which needs to have a copy of Avigilon ACC software installed. Each site monitored is required to have a copy of ACC installed at the local site. If camera event reporting is required, then the copy of ACC must be of Enterprise level.
Full configuration of ACC is beyond the scope of this document. In this section settings important to Patriot monitoring are covered only. Please refer to your Avigilon ACC manual when configuring a new installation.
See also
Configure IP Ports and Firewall
Patriot requires that the ACC server software ports for http (default of 38880), https (default of 38881), udp (default of 38882), and rtp (default start port of 51000) are correctly port forwarded through the external firewall to access media streams over the internet.
Camera Setup
Login to ACC, and confirm all cameras have been added to ACC. this can be performed from Setup > Connect / Disconnect Cameras.
Each Camera must have a zone number associated with it, so it can be tied to a Camera Zone in Patriot. Again from Setup, select a camera, then from the options to the right select General Settings,
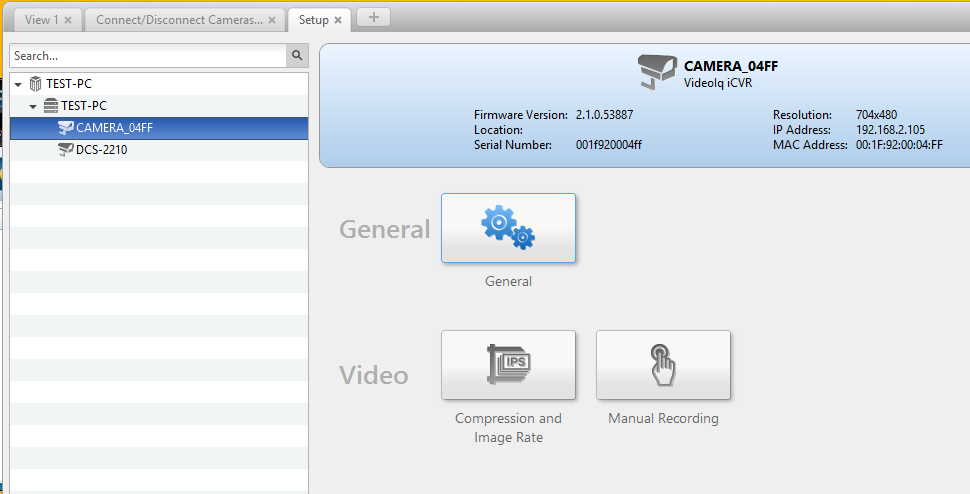
Then enter in a number into the Logical ID field, which needs to match up with the Zone number of the Camera Zone entered into Patriot.

Setup Event Reporting
Alarms can be configured in the ACC software (requires Enterprise edition of ACC), and these will then be reported onto to Patriot.
With the cameras all setup as above, you're ready to setup the Alarm events. Open Setup again, and select Alarms. Here Alarms can be configured to report to Patriot. Click Add to setup a new Alarm.
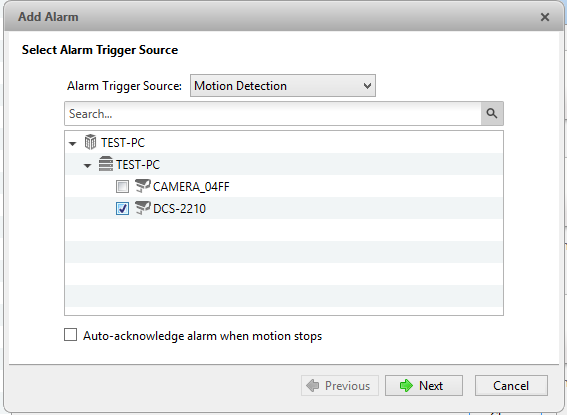
Select the Camera that will trigger the Alarm. Although multiple cameras can be selected, only one camera should be selected per Alarm. This will allow Patriot to clearly report which camera has activated. When setting up something like a motion detection event, this should be repeated for each camera configured. Then click Next.
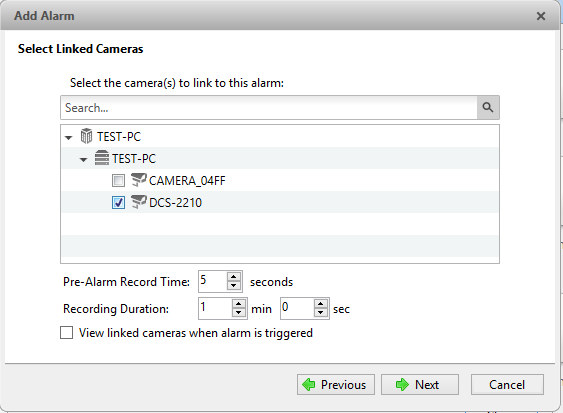
Select the same camera on the Linked Cameras setting. Again, only select one camera here as well. Adjust the Pre-Alarm and Record times as required. Then select Next.
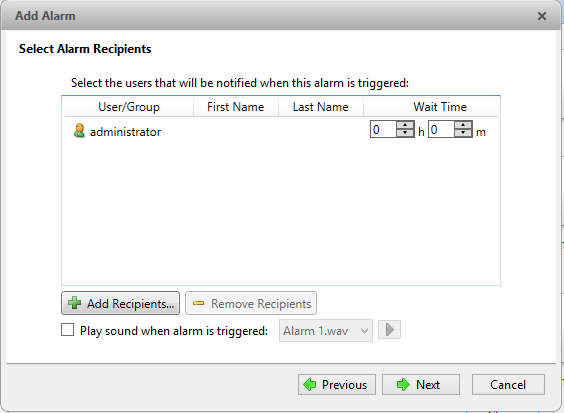
Select Add Recipients, and select the user that you will log in with when connecting from Patriot. Select Next,

Leave default settings unchecked on the Select Alarm Acknowledge Action window. Patriot will automatically acknowledge any alarms it receives. Select Next,
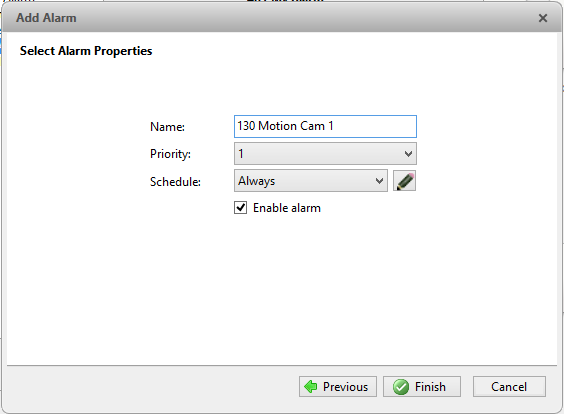
Finally set the alarm properties. The Name must begin with a number. This will be the event type number used when logging this alarm in Patriot. You can create your own template for Avigilon, or use a standard like Contact ID event types. Following the number you can enter a short description of the alarm. This description will be included in the signal logged. The priority is unimportant, but the schedule should be set as required.
Patriot Client Setup
- In the Maintain Client Window, go to the Zones Tab.
- Set the Camera Type option to 'Avigilon'
- Enter the address of the computer running the ACC software into the Location field.
- Enter the Login username and Password (if required). Also select the appropriate Camera Stream. Lower quality streams are more likely to work over slower internet connections. Connection Type for video streaming can also be specified in this section - normally you can leave this empty and Avigilon will automatically detect the correct setting. But if you're connecting via a VPN, or have problems viewing camera streams then you may need to manually set this to LAN or WAN as appropriate.
- Select a Zone which will have a camera associated with it. The zone number must match the camera's logical ID as setup above. Zone Numbers used for cameras should be unique, that is you shouldn't use the same zone number twice, with different modules number, for two cameras. This will give unpredictable results. Check Camera Enabled.
Dual Monitoring with an Alarm Panel
If you are monitoring an Avigilon site in combination with a standard alarm panel, you should follow the best practices of DVR dual monitoring with an alarm panel.
Remote Arming/Disarming the DVR
Avigilon ACC and attached cameras which have alarm event reporting enabled are not normally configured with using schedules within ACC, as frequent changes in the schedule make this impractical. Avigilon doesn't support the standard remote arming/ disarming as per other Camera interfaces, but does allow the event reporting to be controlled by an external input (connected to an alarm panel). Its important this is configured otherwise you will be flooded by motion detection events when the premises is unset. See the ACC documentation for more details.
But to get the reference frame updated every day on closing, the Remote arm event should be configured (not required to setup remote disarm event), as this will trigger the task to update the reference frame.
View the Remote Arming/Disarming a DVR document for further details.
Setting up the Task
The copy of ACC must be Enterprise level to support the sending of alarm events.
The Avigilon receiver task will only log alarm events that have been configured in the ACC Alarms list, as detailed in the previous section.
The Avigilon Task doesn't have many settings to configure. The connection settings for each client monitored come from the Patriot clients' themselves. Just setup the new task, and ensure that the Patriot clients are configured correctly, and the ACC software is configured correctly, to begin receiving events.
The task makes an outgoing connection through the Patriot server firewall, so there should be no need to make any settings changes to the Monitoring stations firewall for event reporting.
Client Polling
If the Task is setup for event reporting, each client configured for Avigilon will be polled. If the connection to the ACC software is broken a poll fail (65021) event will be logged and a restore (65020) will be logged on reconnection. Poll fails and restores will be detected within a few minutes of change of state. If a connection can't be made to the client when initially setup with Avigilon, then an unable to connect (65055) event will be logged.
You won't receive a poll restore event when the connection is re-established. This should be tested manually to confirm its connected again.