Netsuite Integration
NetSuite, a product of Oracle Corporation, is a comprehensive and cloud-based suite of business management applications. Designed to streamline and integrate key business processes, NetSuite offers a unified platform encompassing ERP (Enterprise Resource Planning), CRM (Customer Relationship Management), e-commerce, and financial management.
Prerequisites
- A Patriot Billing License with the AccountingNetsuite module
- Read External Billing Integration
Netsuite Setup
Netsuite facilitates OAuth 2.0 Machine-to-Machine authentication, necessitating the generation of key pairs for authorisation.
-
Setup-> Company -> Enable Features -> SuiteCloud
- SuiteTalk (Web Services): enable REST WEB SERVICE
- Manage Authentication: enable OAUTH 2.0
-
Setup -> Integration -> Manage Integrations -> New
- Enable CLIENT CREDENTIALS (MACHINE TO MACHINE) GRANT and REST WEB SERVICES.
- After creating the Integration, you need to write down CONSUMER KEY / CLIENT ID and CONSUMER SECRET / CLIENT SECRET
-
Creating a self-sign Certificate. This certificate needs to be created at the machine that running Patriot Billing Utility Program(It usually runs with the Task Service).
-
New-SelfSignedCertificate -Subject Patriot-NetSuite-Integration -CertStoreLocation 'Cert:\LocalMachine\My' -KeyLength 4096
Export the certificate and then encode with the command:
-
certutil.exe -encode .\Patriot-NetSuite-Integration.cer .\Patriot-NetSuite-Integration.pem
-
-
In Netsuite, Setup->Integration->OAuth 2.0 Client Credentials(M2M) Setup
- Import the pem file
- Write down the CERTIFICATE ID
-
Modify ApplicationSettings.config under the Patriot Billing Utility Program.
- NetsuiteCertificateId = CERTIFICATE ID
- NetsuiteConsumerKey = CONSUMER KEY / CLIENT ID
- CertThumbprint= The Thumb Print of the self-sign certificate
- TimeOffset = Specify this only if the Netsuite Server time varies from that of your machine
Netsuite Customer
In the billing section of System Wide Settings make sure the standard billing mode explicitly is set so that billing customers can be assigned for charges. A billing customer is simply any user that has the "Enable Billing" checkbox set. When this check box is set the customer tab will appear on the user's record. Customers in Patriot should be reflected in the in Netsuite as a customer.
Create Customer Arguments Example(Task):
customerUpdate --a create --customerId {customerId} --plugin "C:\PATH\PatriotNetsuiteBilling.YourCompany.dll"
Batch Generation
Batch Generation Arguments Example (Task):
generate --batchDefinitionId {batchDefinitionId} --startDate {startDate:o} --endDate {endDate:o} --plugin "C:\PATH\PatriotNetsuiteBilling.YourCompany.dll"
Customise plugin arguments as needed. Reach out to Patriot Support for assistance tailored to your requirements.
When generating batches, it is necessary to provide the PostingPeriodName and LocationName in the Plugin Arguments. Ensure that these values match the existing record names in Netsuite, as both a Posting Period and a Location are required when creating an invoice.
Netsuite Batch Commit
Batch Commit Arguments Example (Task):
commit --batchId {batchId}
File Attachment
Netsuite offers server-side scripting (SuiteScript) to establish a customised endpoint for file uploads. Several additional configurations are required:
- Enable RESTLETS by navigating to Setup -> Integration -> Manage Integrations.
- Upload the script to the Netsuite File Cabinet. For access to this script, kindly reach out to Patriot Support.
- In the Customization menu, go to Scripting -> Script, and generate a new script by choosing the uploaded script.
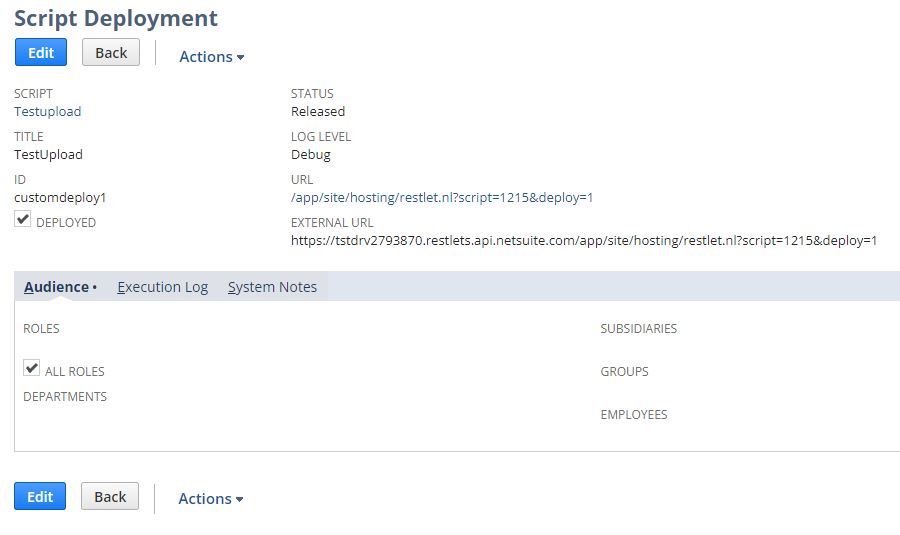
- Create a deployment for this script, and note down the script ID and deployment ID. Ensure that "All Roles" is selected.

The Batch Commit Argument will now be:
commit --batchId {batchId} --scriptId 1215 --deploymentId 1