Basic Monitoring Tutorial
This tutorial introduces basic Patriot concepts. It assumes that Patriot 6 is installed on one or more computers and that you have a good understanding of the Microsoft Windows environment.
This section should take approximately 30 minutes to complete and will cover the following steps:
- Logging in to Patriot
- The button menu
- Viewing client site details
- Manually entering signals including an alarm
- Responding to an activation
- Viewing signals
Log in to Patriot
Double clicking on the Windows 6 desktop icon will display the Patriot 6 Login screen. In a newly installed Patriot 6 system, the default account is sa and the password is sa. You can use this account to login to Patriot.
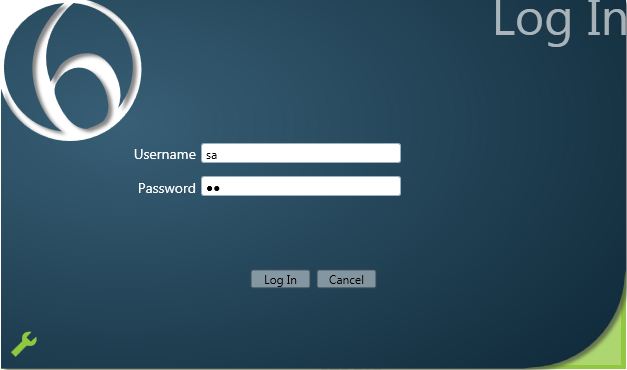
Username: sa
Password: sa
Initially you will be in the Patriot start up Window. Here you will see system information which can include a recently added client list, help resources and an optional news section.
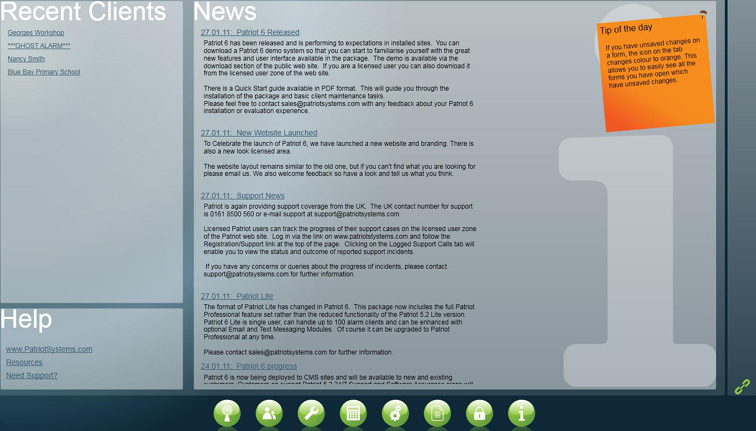
The Main Menu
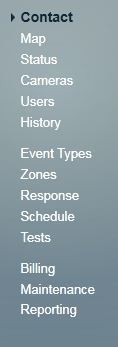
At the foot of the screen you will see the Patriot Main Menu. This gives you access to all parts of the Patriot environment. Hovering your mouse over any button will indicate its function.

Viewing Client Site Details
 The Search Clients button opens the Search Clients browse which lists all current clients. Note that the list may include 'Ghost Alarms' and these are discussed later in this section.
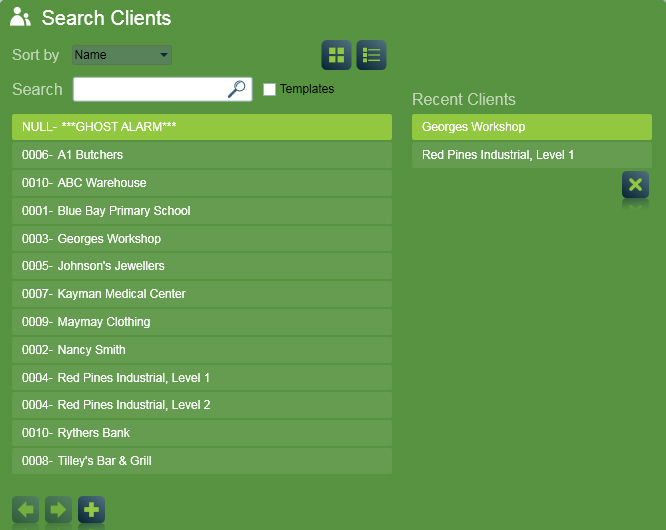
The 'Sort By' option can be used to list users by Name or Account number.
An Account number or any part of an account name in entered into the Search field will display one or more accounts which meet the criteria used.

 The Basic and Detail View Buttons will toggle between brief or extended client detail information. Detail view gives address information.
Any of the listed clients can be selected with a single mouse click. This will display the Client Window.
Multiple client windows can be open at any one time and you can move from client to client by clicking in the workspace bar at the top of the Patriot window.


The current activations panel is to the right and shows events which require operator attention at a glance.
The look and content of this panel will vary depending on which Patriot package is licensed.
The status of the site is shown using icons at the foot of the left hand menu bar.
![]() Unset
Unset ![]() Set
Set ![]() On test
On test ![]() Respond to alarms
Respond to alarms
The menu bar at the left of the client window gives you access to all aspects of client data
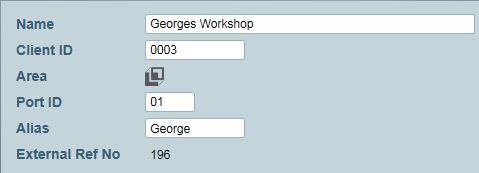
When a client is initially selected, the Contact Tab will be the first window displayed.
We can look at each of the menu items for the George's Workshop client - which is included in the demo data.
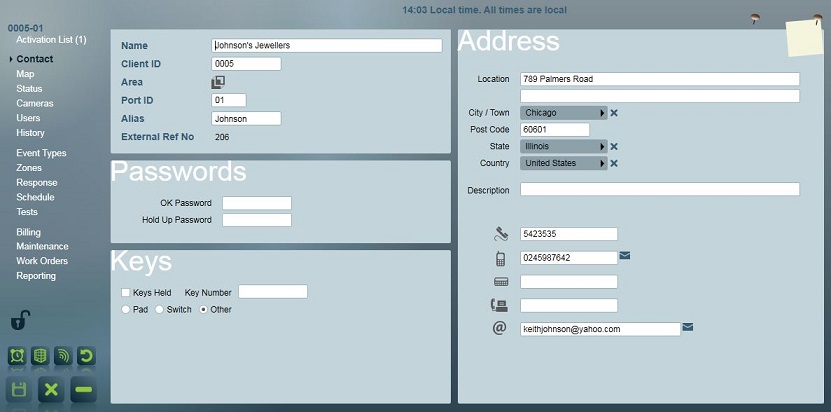
Contact Tab
This screen includes all contact detail for a site.
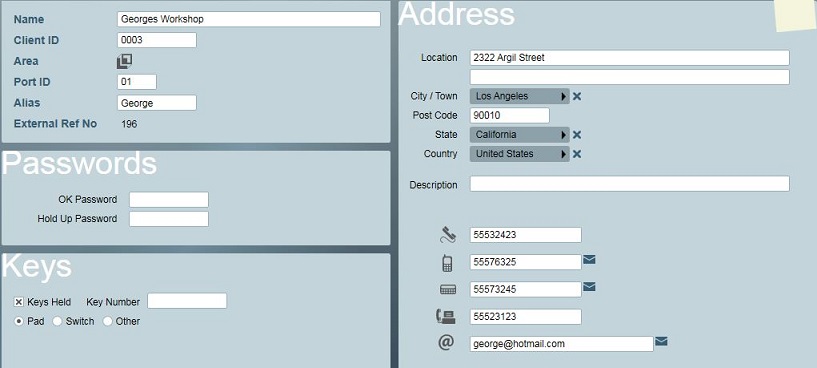
The client ID is the alarm panel number. This will usually be supplied by the panel installer.
The Area (or Partition number) is important at large sites with multiple or partitioned alarm panel(s). Each area of a partitioned client gets its own client account in Patriot. Area accounts have the same Client ID and a unique area no. e.g. 0003(1), 0003(2) etc.
 Area clients of a partitioned site are linked via the Base account which contains information common to all areas. The client base account has no area no. it is instead identified by the base account icon or simply by the Client ID alone. Smaller sites that just have a single alarm panel and no panel partitioning (or partitioning that you wish to ignore) are represented in Patriot by a single client account - the base account.
The Port number is used to distinguish between different alarm receivers and can be used where duplicate account numbers are encountered.
The Alias is used in situations where an alternative site name is used to protect the site from identification by unauthorised parties. (Unencrypted radio traffic is a typical example.)
Password and Key information can be recorded.
In the address area, the City, County/State and Country fields can be filled from drop down selection lists. These are accessed by clicking the right pointing arrows at the end of each field.

Selections can be made from the list in the pop up window by double clicking the entry required. Clicking outside the selection box will close it.
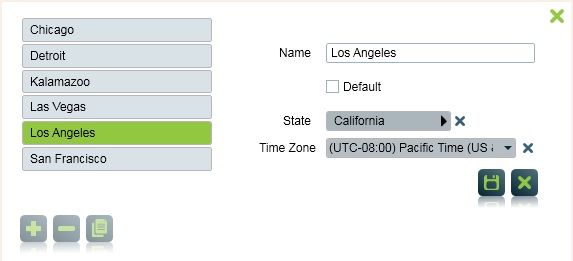
 The Add button can be used to insert additional locations into the browse as required.
The phone icon to the right of the phone number fields is used to initiate a quick dial call to the associated number. This feature is available throughout Patriot.

Site notes can be added by clicking on the note icon at the top right of the client page. You will note that when notes are present, the colour of the icon changes to orange. The note can be set to expire at any time by checking the expire note check box and selecting and expiry date from the displayed calendar.


 Details changed on the contacts - or any other client pages can be saved or cancelled using the buttons at bottom left of the client menu.
Event Types Tab
Patriot 6 templates make it simple to configure the wide range of client side equipment in use. You can select a signals type template from defaults available in Patriot or you can create your own.
Select Event Types to see how signals from a customer's alarm panel are interpreted by Patriot.
We will use the George's Workshop site client which is included in the sample data supplied with your software.
Event types are the signals received from customer alarm panels. These could arrive via alarm receivers or directly from IP equipped alarm panels.
Event types are also created by Patriot itself. These can include open out of hours and no signals monitoring events.
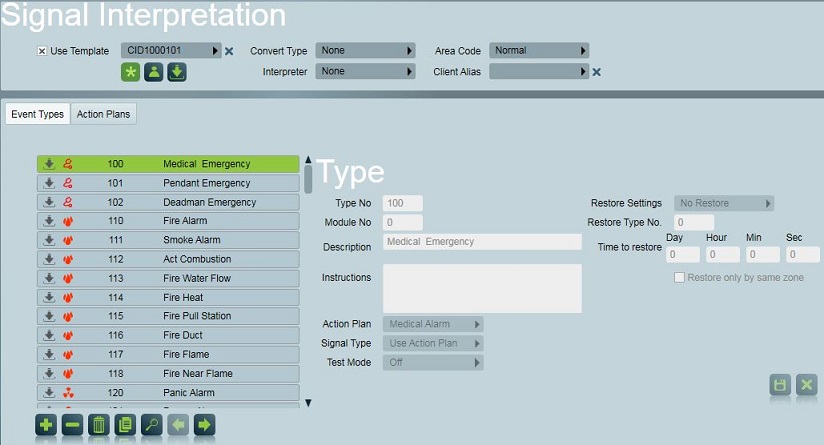
We will use an existing template for the George's Workshop site. In the Signal Interpretation area, the Use Template option is selected.
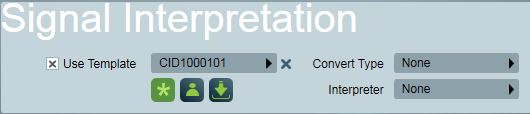
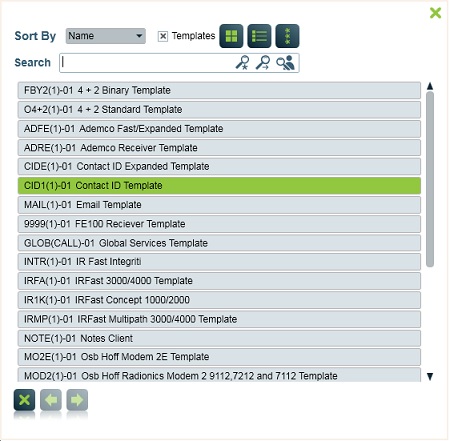
A scrolling list of available templates is obtained by clicking the arrow at the right of the Template field.
Selection is made by double clicking the template you want. We have selected the industry standard Contact ID template for George's Workshop but it could be any one of a number of pre-defined options.
The template provides plain language descriptions for each of the signal values that could be logged for the George's Workshop site.
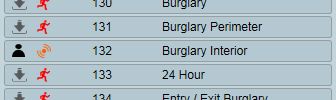
With the standard Contact ID template, we can see that a signal type no. 132 is described as 'Burglary Interior.' In the Types area, this signal type is set to use the 'Intruder Alarm' Action Plan.
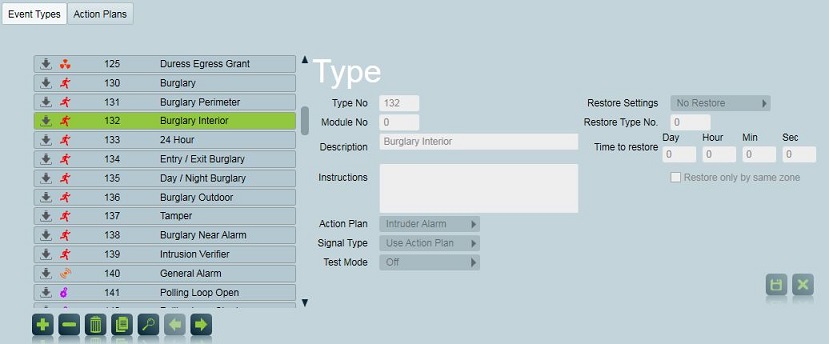
Action Plans define how Patriot will process signals. An action plan can determine the alarm priority of a signal, whether zone and user information is pertinent and also whether or not operator or other notification processes will be started. Patriot includes a pre-configured set of Action Plans and these can be modified and augmented as required.
Scrolling further down the template list we see that signal type no. 401 represents an 'Open' and that this is assigned the 'Opening (Unset) no alarm' Action Plan. (Action Plans will be covered more later.) Type no. 1401 represents a 'Close' signal. Type no. 120 signal is a Panic Alarm which is assigned the 'Panic Alarm' Action Plan.
The Signal Types table can be modified for individual sites so while templates simplify client configuration, they don't limit the flexibility of Patriot.
To modify the way that the George's workshop site handles a type 130 - Burglary Interior - signal, click the add button at the foot of the signal types list.
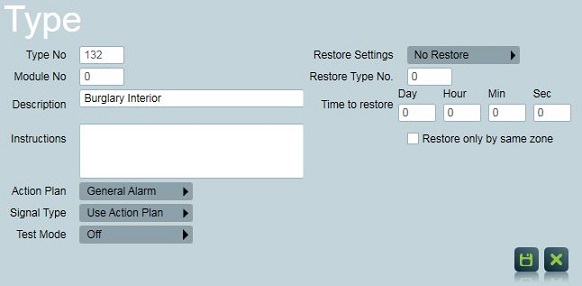
In this case we have changed the action plan assigned to the 'Burglary Interior' signal type from 'Intruder Alarm' to 'General Alarm'. We could also change the Description or add instructions specific to Burglary Interior events at the George's Workshop site. This process is known as overriding an event type at the client level and it allows Patriot to readily adapt to situations where an alarm panel has non-standard programming.
Event types overridden at the client level take precedence over template level types so once a template event type has been overridden only the client level type is visible in the event type listing.
Zones Tab
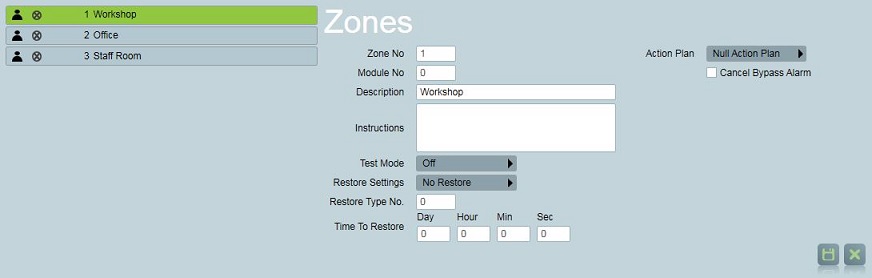
Selecting the Zones tab for George's Workshop shows the details of each Zone in the client site. Zones are associated with PIR sensors, panic alarms, cameras etc . Zone definitions help to provide plain language location information to operators during alarm processing.
We can see that George's Workshop has three Zones defined. Selecting any Zone will display it's details
A Zone can be put in Test Mode so that signals from it are filtered out. This is useful if maintenance work is being carried out on Zone equipment or if it is malfunctioning.
An Action Plan can be allocated to a Zone and this will have precedence over any provided on the Types tab.
Users Tab
Selecting the Users menu item for George's Workshop shows the users that are associated with the site.
Users can be alarm response personnel, key holders, site management etc. Some users will be in the list of parties to be contacted in the event of an activation and these are selected as part of the Response Plan for an activation. This information is used by operators during activation processing.
Users can be global (assigned to multiple sites) or associated with this site only. If a user template is used, users associated with the selected template will also be allocated.

In this case, users from the Global Services Template are included in the list of users associated with George's Workshop.
 Users for this site are either created specifically for George's Workshop or selected from a global user list. The global user list is accessed using the Assign Existing User button at the foot of the user details window. When a global user is assigned to a site all user details in the Global Details section are shared. If you attempt to edit the global details of a user assigned to multiple you may receive a warning message.
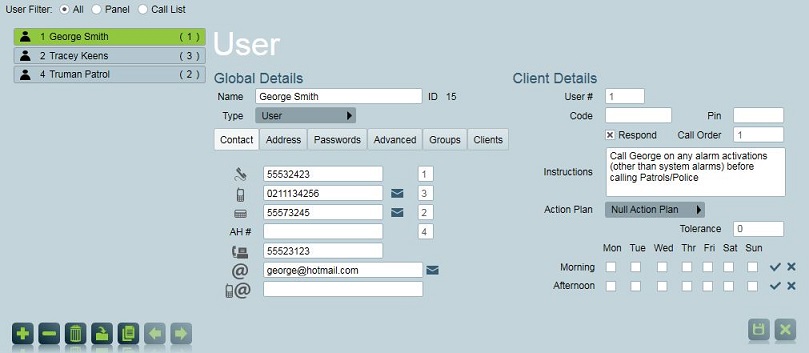
Three users are shown for George's Workshop and each has been assigned from the global users list.
Highlighting any user will show their contact details, special instructions for operators and the call order which determines user call priority when activations are processed.
User details are used in alarm processing and the relationship between Action Plans and users is determined by Patriot's powerful Response Plan features.
Response Tab
Response Plans define the signal handling processes for activations. Response plans are associated with Action Plans. They can be global where a number of client sites will use the same Response Plan for a given Action Plan or they can be unique to an individual site.
A Response Plan will guide an operator through processing an alarm. It can also initiate alternative notification procedures such as Text Messaging, Email or the Telephony.
Selecting the Response Plan item from the client menu bar will open the client Response Plan configuration tab for George's Workshop.
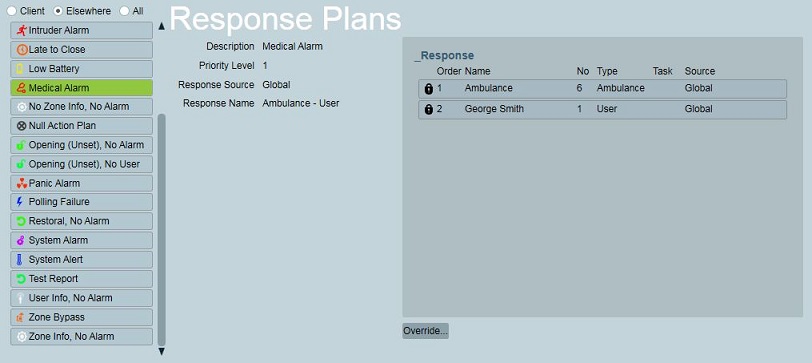
Upon first popup the tab, you will not see any response plans. This is because no custom client level response plans are in use at George's Workshop. However when you switch the response plan filter setting from 'Client' to 'Elsewhere' (or 'All') you will see the full list of Action Plans for George's Workshop on the left. Highlighting any one will show the details of the Response Plan associated with it. Note that for every action plan 'Response Source' is set to 'Global'. This indicates that George's Workshop is simply employing the default set of response plans which have been assigned at the global level. Client level response plan customisation can be made to any action plan by clicking on the 'Override...' button.
Looking closely at the 'Medical Alarm' response plan we see that one of two assigned response users - George Smith - is from the list of users allocated to the site. The other response member - Ambulance - originates from the Global Services template which was imported back on the Users tab. This shows us that the 'Ambulance - User' response plan which includes all users of type ambulance and type user (in that order) searches for matching users at both client and template level.
Overriding an action plan's response can be done in one of two ways:
- By Type
- By User
Overriding By Type is the easiest method, you simply select a pre-configured response plan to replace the global action plan response.
Overriding By User is more complicated, you have to add or remove users manually from the response using the buttons that appear at the foot of the response user listing.
For example, if you click the add button you will see the Truman Patrol in the available list, double clicking adds Truman Patrol to the response plan. Double clicking the Truman Patrols again opens the response member maintenance window.
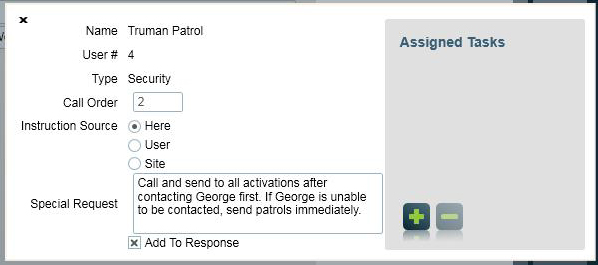
The call order for the user can be modified and if required, special request detail can be added. You can also set whether operators should see special requests entered for the Response Plan (here), from user details or from the site itself.
If specialised communications modules such as Text Messaging or Email are included in your Patriot Licensing, these tasks can be added to this user's details. This means that notifications will be sent to the user automatically via the method selected.
Now that we've seen how the essential details for George's Workshop are configured, we can look at how an alarm for the site is processed.
Manually Entering a Signal
Signals Window
The Patriot Signals table logs all signals received from external sources and others that are generated by Patriot itself.
Signals can come from alarm receivers, IP equipped alarm panels, CCTV systems, Text Messaging, Email and Telephony tasks. Signals can also be initiated via third party software integrations. Patriot has exceptionally flexible signal processing options.
So that we can observe how Patriot processes activations, we will insert a signal manually. This is for training purposes only.
 Click on the Signals Menu Button and select the second menu option -'Signals'
The signals browse shows every signal that has been received from various sources.
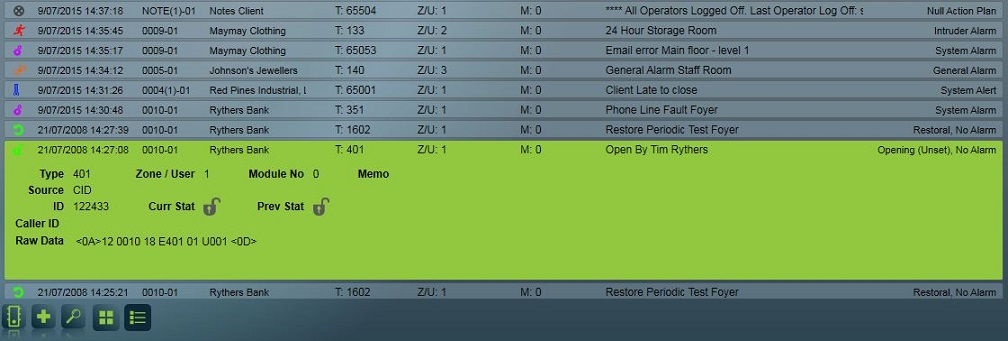
Each signal has an icon associated with it which identifies the type of Action Plan associated with the signal type. The most important signal details are directly visible in the listing and signals can be expanded with a single click to display additional details. Double click through on any signal to open the relevant client account.
In a busy monitoring centre the table can be updated at very short intervals resulting in it scrolling quite quickly.
 You can use the Traffic Light button at the foot of the signals list to pause the display. Signals continue to be logged but your view is frozen while you examine signal detail. The Traffic Light button will turn red to indicate that the signal display is paused.
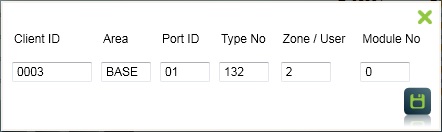
To manually insert a signal for George's Workshop, use the Insert Signal button at the foot of the signals list.
In the example below, a Contact ID burglary signal (132) has been created which originates from the Office(Zone 3) at George's Workshop (0003). The record is saved.
A record will appear in the signals table showing that the signal has been entered into the database. This happens for all signals irrespective of whether or not operator intervention is required.

As this signal is a Burglary Interior which we previously assigned the 'General Alarm' action plan, an activation notification will be posted and an audio queue will sound according to the 'General Alarm' action plan settings.
The 'General Alarm' notification will be displayed in the Activation Status Bar at the right of the Patriot workspace.
Current Activations Window
Click on the Signals Menu Button and select the first menu option - Current Activations
The new 'General Alarm' activation will appear in the current activations list to the left of the window. Highlighting the activation will show details in the Activation area to the right.
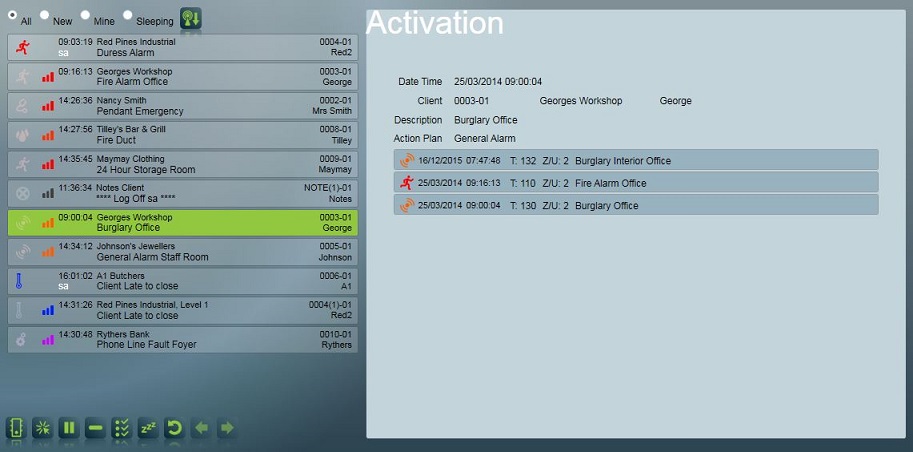
If the New option at the top of the current activations list is selected, only new alarms which are not being processed will show. If the Mine option is selected, only alarms being processed by your operator account will show.

Double clicking the activation will open the George's Workshop site's activation window. A detailed alarm description is provided at the top of the window.
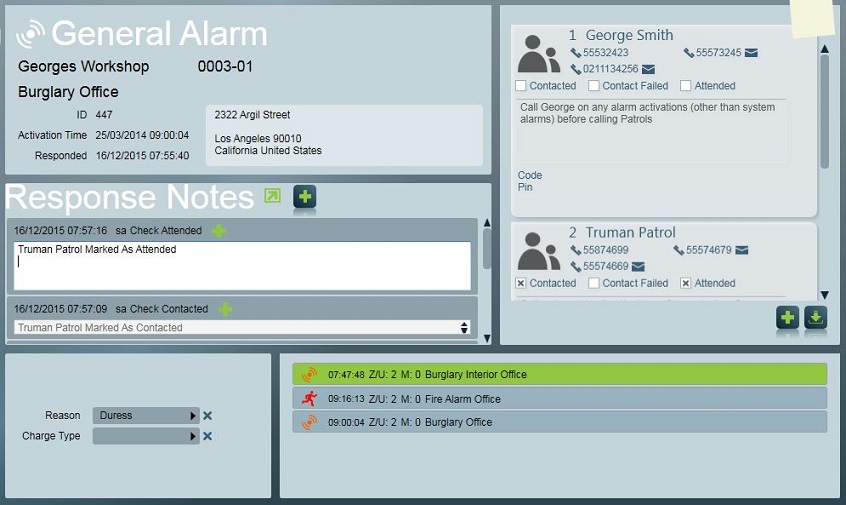
The activation will now show in the 'My Activations' list to the on the Activations bar at the right side of the screen.
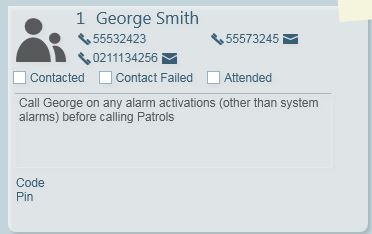
Response teams, key holders etc. who may need to be notified are in a scrolling list to the right of the window. These response members have been specified by the 'General Alarm' response plan for George's Workshop and the users themselves originate from both the site (George Smith) or they may be from a global user list (Truman Patrol).
Details for of the response personnel include phone numbers and these can be autodialled using the icons at the left of each phone no. field.
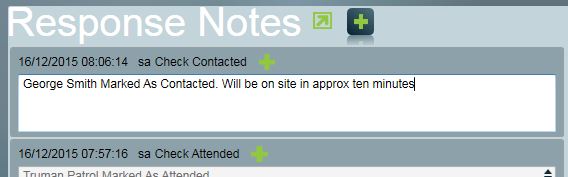
As each stage of the alarm response process, the Contacted, Contact Failed and Attended boxes can be checked to record progress. Each of these actions are recorded in the Patriot signal log and this data can be used for subsequent reporting. As each box is contacted, an entry is created in the Response Notes area of the screen and this information can be added to as required.
 Once an alarm response is in progress, the alarm can be put on hold using the On Hold Button at the bottom left of the window. The audio cue will change tone to advise that the alarm is still to be completed.
On hold alarms will still show in the Current Activations listing if the All option is selected. The alarm can be returned from an on hold state at any time by double clicking it in the listing.
 If an alarm is to be removed from focus for a predetermined period, it can be put to sleep using the sleep button. The alarm disappears from the Activations lists unless the Sleep option is checked.
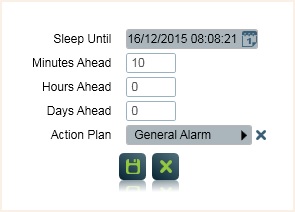
When the Sleep period elapses, the alarm will re-activate and once again appear in the current Activations lists and processing can continue.
Details as to the cause of the alarm can be added in the response notes section as required.
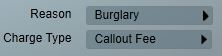
The incident causing the activation can be selected from the Reason List. A charge (if any) for the activation and resolution is selected from the Charge Type list. This is used for reporting and accounting integration data.
 The alarm is completed using the Completed button. This removes it from all activations listings. A response note recording the time and the operator who completed the activation is automatically inserted.
All steps in the activation response process are recorded in the Patriot database and available for reporting and queries.