Contact Tab
Use the Tab key on the keyboard to move through the fields on each tab, or place the cursor in the field where you want to insert data.
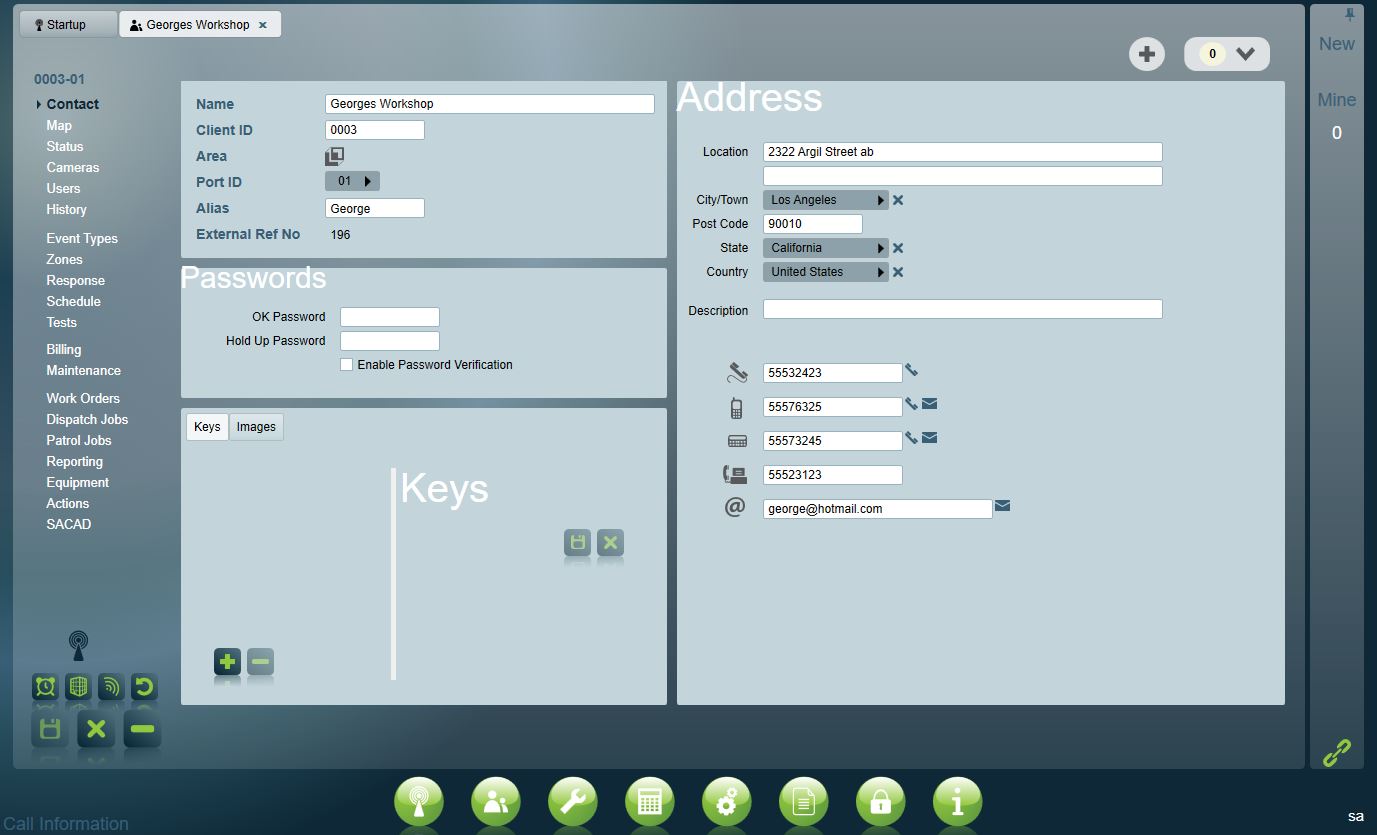
The Contact tab appears by default when you select a client. Pressing the Tab key will move you from one field to another, and this is where you will enter the following:
-
An alpha numeric client number (this should match up with the client ID sent from the alarm panel). This can be alphanumeric characters, up to 16 characters long.
-
The area (group, partition) number. This area number must correlate with the area number received from the panel. Base clients will not display the area number, and instead show a base account icon. See the Area Code section in the Event Types Tab document, and the Partitioned Clients document, for more information.
-
The client alias (the name by which the client may be referred to over the radio to prevent identification by external persons).
-
The external reference number (A Read Only, unique number for this site, generated by the system when the site is inserted. This number appears on all external data sent from the monitoring station, i.e. paging, text, or Email messages).
-
The client's name.
-
Business (during work hours) telephone number. You can use the Auto Dial buttons to quickly dial a person's number. See Auto Dialler.
-
Fax number, mobile phone number and pager number. See Phone Dialler.
-
The client's location. A good description is important to assist patrols and emergency services responding to activations.
-
Postal address and email address. To set up a City/Country or any other selector field - click the empty
 button. A Pop up window will appear. Double click to select an existing item from the list or click the Add New
  button to enter a new item. Click Save
  to add it to the list. Once added, items can be used for all clients. These can be preconfigured as option by using the Maintenance > general > cities option from the main menu.
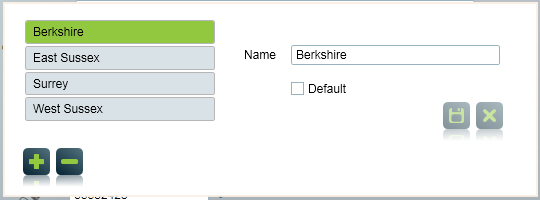
City, State, and Country can be selected from a popup list.
Passwords
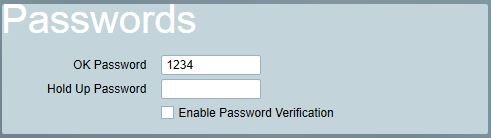
OK password: used if everything is OK at the premises.
Hold up password: used if the premises is currently being robbed.
Enable Password Verification: check if the clients OK or Hold up password has been verified when opening an activation.
Keys
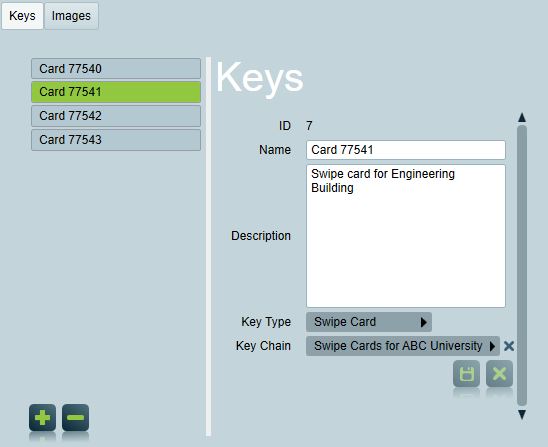
Key Type: Used to indicate what kind of access interface is at the site. Key Types can be maintained from Maintenance > Clients > Key Types
Keys Chain: Only available when Dispatch Module is registered. Used to group keys across clients. Key Chains can be assigned to users - by default users can only see keys assigned to a key chain that they are assigned to when responding to a Dispatch job. Key Chains can be maintained (including user assignment) from Maintenance > Clients > Key Chains. The system wide setting Default Key Chain User Filter sets the default user type that can be assigned to key chains.
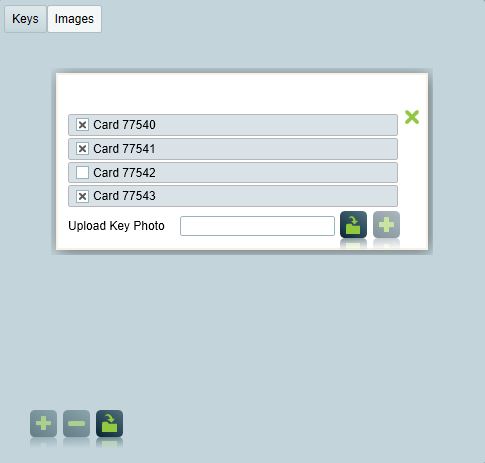
Image of the key can be uploaded to patriot by clicking the  icon in the Images tab. By selecting multiple keys, an image can be shared between different keys.