Maintenance Tab
The Maintenance Tab stores technical information about the alarm panel system installed at the client premises.
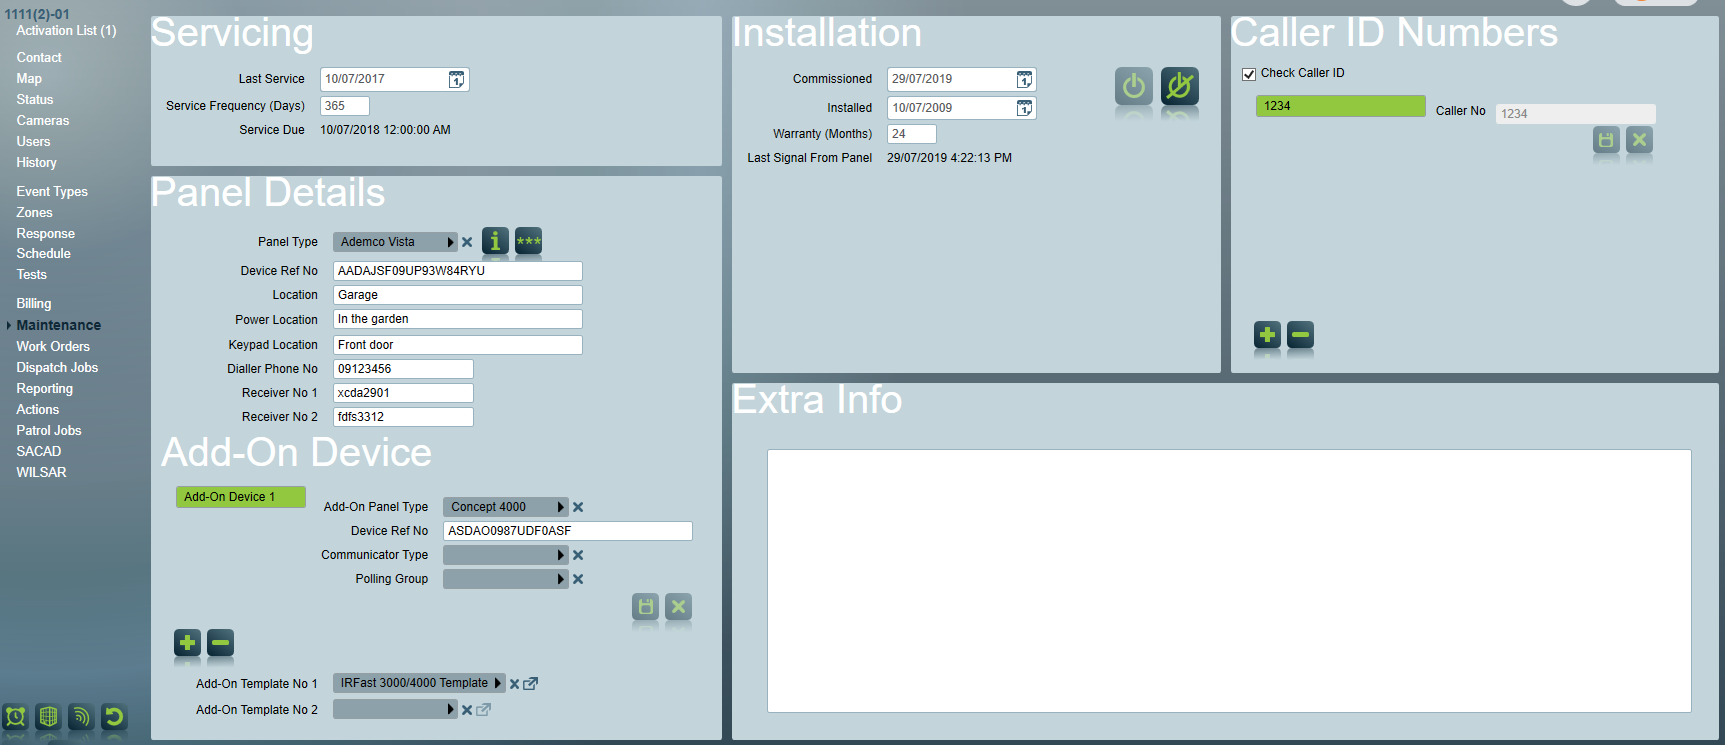
Servicing
The Servicing Area enables you to fill in the following fields:
- Last Service - date the panel was last serviced.
- Service Frequency - how often this site is serviced, in days.
- Service Due - The due date of the service calculated from the above two fields.
Installation
The Installation Area enables you to fill in the following fields when the current client is commissioned:
- Commissioned - date the client was commissioned for monitoring.
- Installed - date the client's alarm panel was installed.
- Warranty (Months) - used to record the number of months the alarm panel is under warranty for.
- Last Signal From Panel - Indicates the date time of the last signal received from the panel for this site.
There are two commands in Installation Area:
Commission - commission the client.
Decommission - decommission the client.
A new pop-up window will be opened once the operator clicks "Decommission":
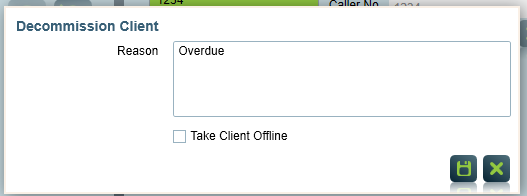
- Reason - the reason of why decommission the client.
- Take Client Offline - to stop receiving signals and activations from the client, this option has to be ticked, otherwise the signals and activations from this client will still show up.
After the client is decommissioned, two new fields will show up in the Installation Area:
- Decommissioned Date - date the client was decommissioned for monitoring.
- Decommissioned Reason - the reason for decommissioning the client, which has been entered in the decommission pop-up window
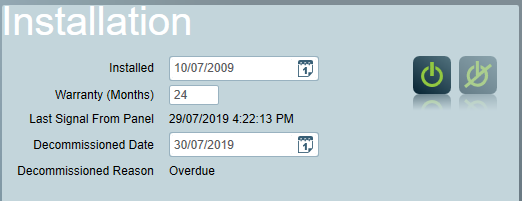
If commission/decommission in one of the area from a client, all other areas and the base will be commissioned/decommissioned at the same time, providing they are linked to base!
Panel Details
The Panel Details Area enables you to:
-
Select the Panel Type from the drop down list. Panel Types must first be set-up in Maintenance > Clients > Panel Types. To make client setup faster, panels can be preloaded with default settings for template selection (Type Template, Converter, Interpreter, and Zone Template). When the panel is selected, these defaults are copied into the client.
-
The Panel Instructions button is used to quickly display the panel instructions for the selected panel (if previously setup in panel maintenance)
-
Enter information about the panel.
-
Set the Device Reference No. This must be a unique (Patriot will enforce this - you cannot save a client if the device ref. no. is in use by another client) number and is used by several of Patriot's messaging tasks and modules (GSM, Life Watch, Telephony) etc. so locate a client to which a signal should be logged. E.g. in the case of a Life Watch client you would set the device's IMEI no. here.
-
Select up to two Add-On Panel templates. An add-on template can contain both event type and zone information, and is additional to the event type and zone templates selected on the client's event types and zones tabs. Most alarm panel systems do not require any add-on templates. The typical scenario in which you may need to create and set an add-on template (or two) is where the alarm is reporting via an Add-on IP device* where a dialler is attached to an external device that allows IP communication. In this scenario, the add-on device will typically have an additional list of events that it can report in addition to the alarm panel. Templates for these additional events can be setup and assigned to the client here in the Panel Details section. This means the Add-on templates can be kept separate from the Panel Templates. Note that event types and zones defined in the add-on template no. 1 will take precedence over those defined in add-on template no. 2, and both add-on templates will take precedence over the clients types and zones and the main template (in the case of conflict). If a zone matching the received signal is found in the Add-on template this will be used. In all other cases (where only a matching type is found for example) the Add-on template will be ignored. Because a matching zone must be found, the event type used must be assigned to an action plan with a signal type of either zone info or restore with zone info. Add-on templates also support template chaining. The clients Signal Interpreter is not applied to the Add-on template. Add-on Templates may also be used to assist the setup of dual monitoring clients.
*Examples include the Permaconn and IR Multipath systems where an extra IP/GPRS communicator module is attached to a standard dialler alarm panel. In both of these systems the communicator module has its own set of event types and zones independent of the alarm panel.
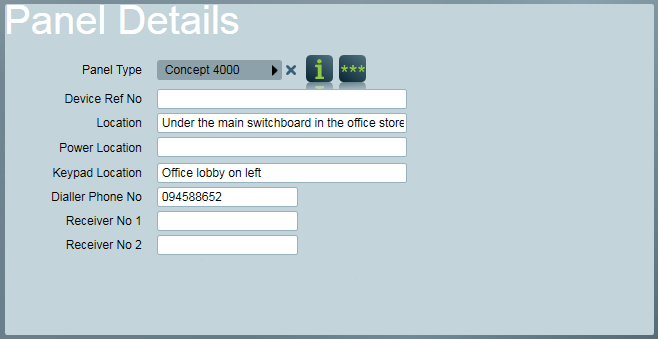
Please Note: panel details can also be referenced from Base account (Read Partitioned Clients for more information).
Panel Types
You can add or delete a panel type from the "Panel Type" pop-up menu.
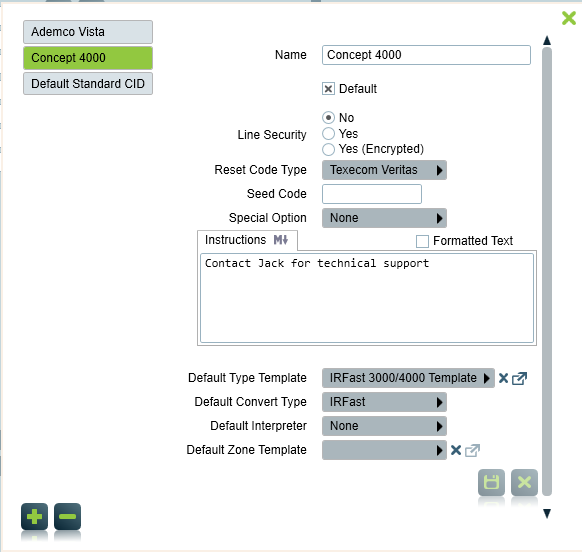
The Panel Type Pop-Up enables you to define:
- Name and other general information of the panel
- Special Option: what other options the panel has.
- Instructions: The instruction of the panel, this can be view via the
icon in the "Panel Detail" section.
- Default Type Template: The type template this panel uses. This will overwrite the existing event type template when the panel is newly assigned to the client.
- Default Convert Type: The signal convert type should apply to this panel. This will overwrite the existing signal convert type when the panel is newly assigned to the client.
- Default Interpreter: The signal interpreter should apply to this panel. This will overwrite the existing signal interpreter when the panel is newly assigned to the client.
- Default Zone Template: The zone template this panel uses. This will overwrite the existing zone template when the panel is newly assigned to the client.
Once you set up a panel type, you can apply the panel type to other clients that have the same type of panel. The event type template, signal convert type, signal interpreter and zone template of this client will be set to the default listed in the panel type form.
Extra Info
Notes
This is a free form area where you can insert any additional information about the client.
Documents
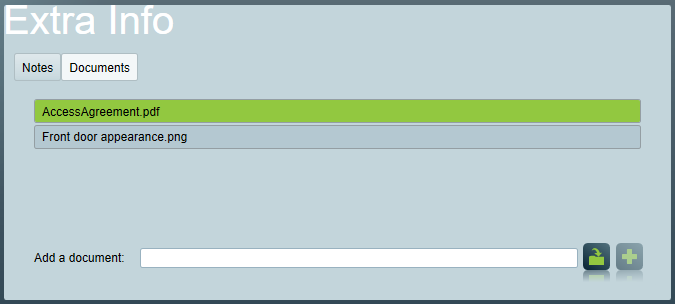
Patriot is able to store and retrieve documents from a file share for each client.
By default this feature is hidden and must be enabled in System Wide Settings > General Client Settings > Enable Document Repository. Once enabled the address for the fileshare must be put in the Mapped Drive Location. This location needs to be a network drive accessible from all workstations as input, local storage accessible to the Patriot Data Service only will not work. The Folder Structure setting determines the names for the client folders in the document repository based on the Client No, Area Code, and Port ID. The default setting ensures each clients folder is unique.
When enabled and properly configured the Documents tab in Extra info will be visible. Documents can be added by selecting them from the local workstation and uploading them with the add button. The uploaded files can be any file type and can be opened by double clicking them. They are opened locally on the current workstation using the default program for that file type. Clean-up and deletion of files cannot be done from the Patriot Client and should be done my an administrator by navigating to the fileshare itself.
Caller ID Numbers
You can specify the Caller ID numbers belonging to the site under the Caller ID Numbers section. If Check Caller ID is enabled, Patriot will check the caller ID number for all signals coming from the panel against the caller id records of this client. The caller id records and the sites Business Phone Number and the Panel Dialler Phone Number are checked. If an unknown caller ID is received, Patriot will generate an alarm (type 65031) indicating a caller ID mismatch. The new caller id number is now automatically added to the sites caller id list, to prevent repeated caller id mistmatch alarm signals.