Register App For Outlook Email Service
This is a quick guide on how to register an app and configure API permissions in the Azure portal so Patriot Task Service can be authenticated via OAuth to get access to Outlook Email service.
Prerequisites
The account you are going to use to send or receive emails must be associated with a tenant. Setup of a tenant is out of the scope of this documentation.
Register an application
Follow these steps to create the app registration:
- Sign in to the Azure portal
- If you have access to multiple tenants, in the top menu, use the Directory + subscription filter
 to select the tenant in which you want to register an application.
 - Search for and select Azure Active Directory.
- Under Manage, select App registrations > New registration.
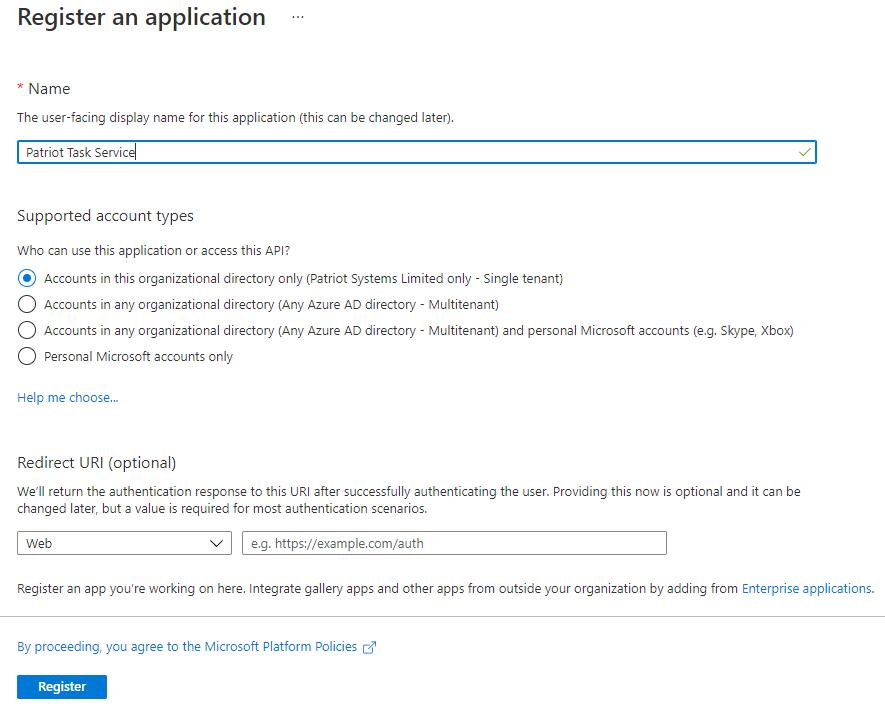
- Enter a display Name for the application representing Patriot Task Service.
- Select Accounts in this organizational directory only as the Supported account type.
- Leave Redirect URI blank.
- Select Register to complete the initial app registration.
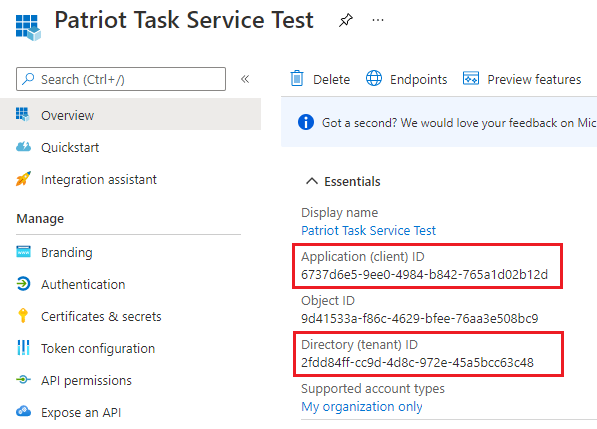
Once the application is registered, the Azure portal will lead you to the Overview pane of the application. You will see the Application (client) ID and the Directory (tenant) ID, which will be entered into Patriot Email task settings.
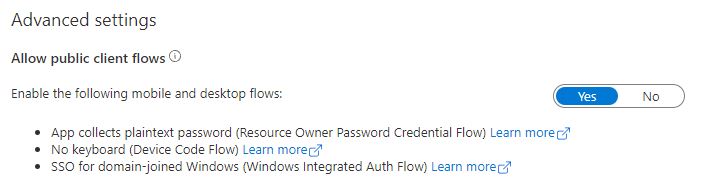
Allow public client flows
- Under Management, select Authentication.
- Select Try out the new experience (if shown).
- Under Advanced settings, and section Enable the following mobile and desktop flows, select Yes to treat the application as a public client.
- Select Save.
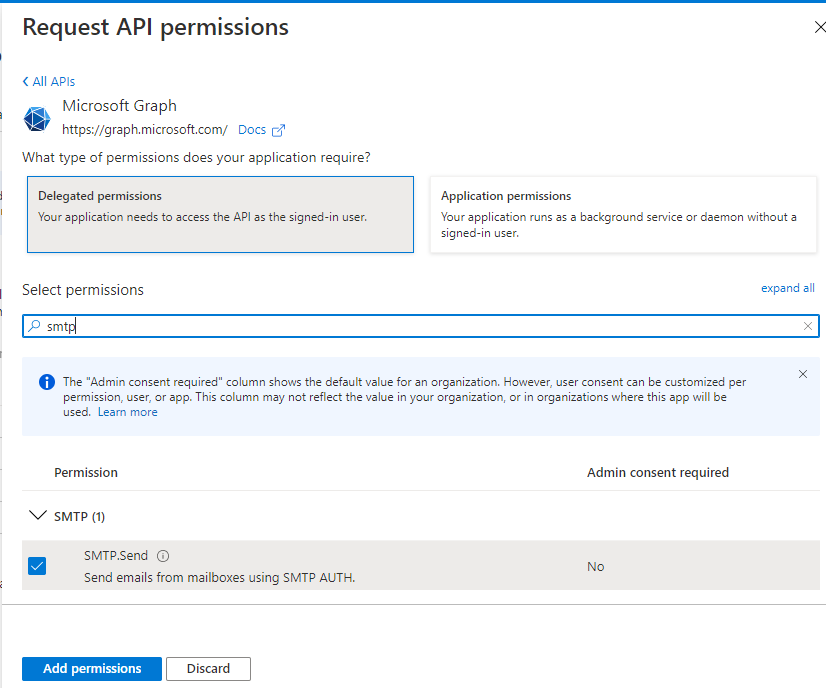
Configure API permissions
- Under Manage, select API permissions.
- Select
 to add a permission.
 - Select Microsoft APIs* > Microsoft Graph > Delegated permissions.
- Select SMTP.Send for sending or POP.AccessAsUser .All for receiving, according to what service you are going to use. Also select offline_access which allows Patriot to refresh an expired token. You can search for these permissions by name.
- Select Add permissions to add selected permissions.
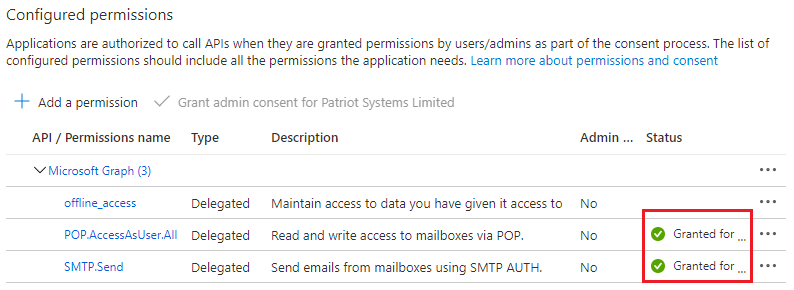
After these permissions are added, you will see a list of Configured permissions in the API permissions pane.
Select Grant admin consent for ‹the tenant name› to grand admin consent for SMTP and POP permissions. They should all be marked as Granted for ‹the tenant name› in the Status column. This is essential for Patriot to perform OAuth authentication silently without user interaction. This can only be done by an administrator.
Save all the changes.
Configure SMTP Client Authentication
In some cases, you will need to enabled the SMTP Authentication for the tenant, in Microsoft 365 Admin Center.